FOSSIL PREPARATION
FOSSIL PREPPING 2022
Some of the trilobite bits that were found on the collectors fossil trip in July will be used as fossil giveaways at future museum functions. My fossil prepping skills definitely need sharpening so I wanted to practice on some these.
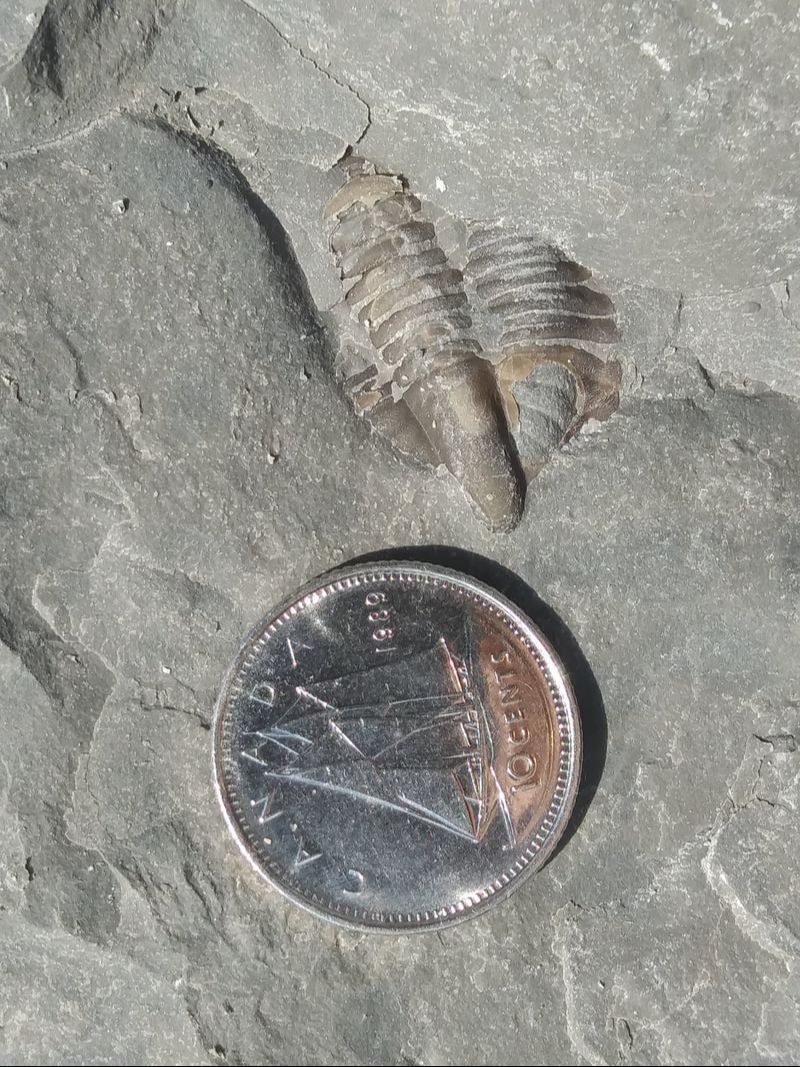
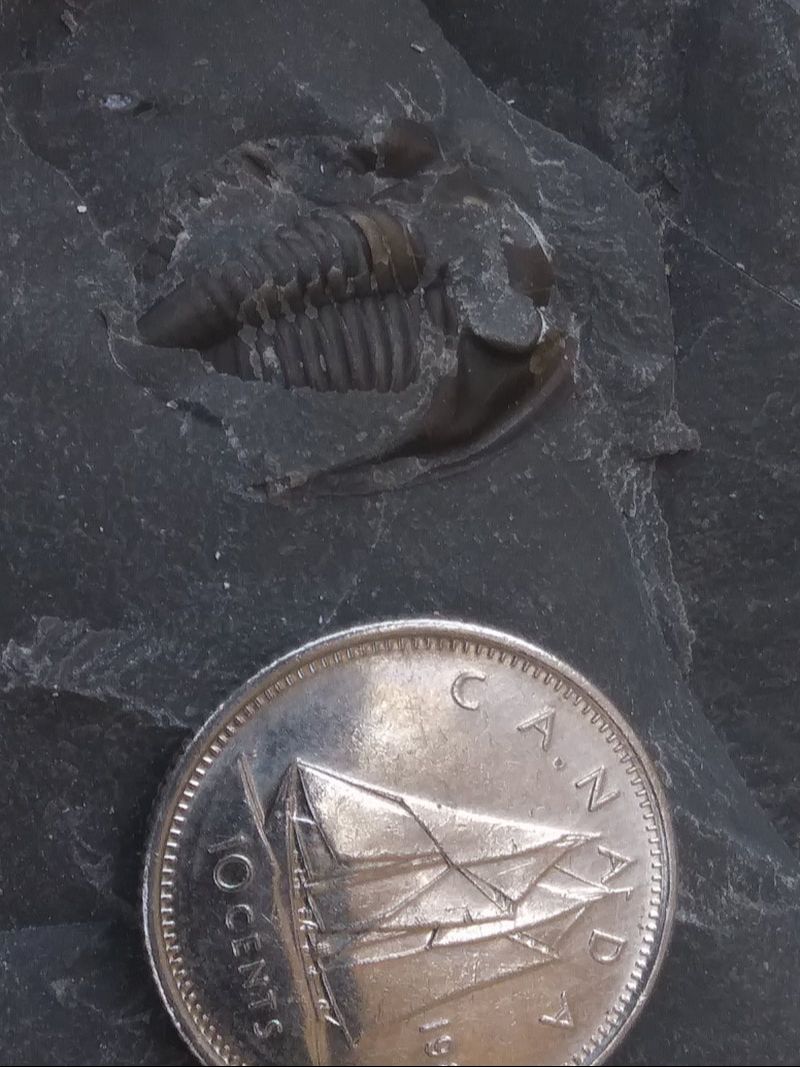
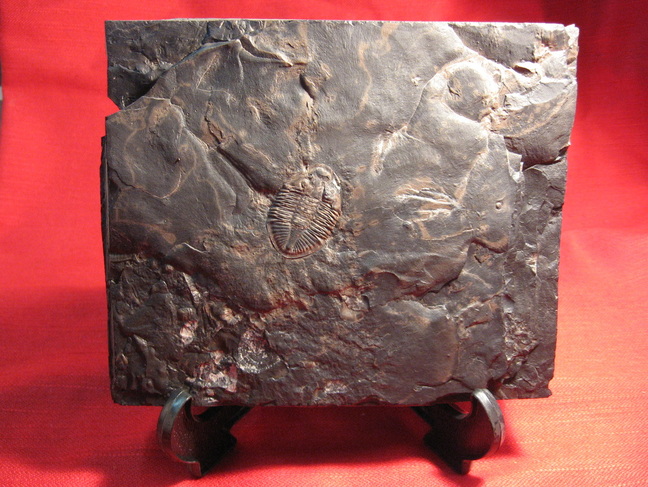
A Bathyurus trilobite tail (pygidium) and mid section (thorax) peeking out of the rock as found at the quarry.
|
An air scribe (mini jack hammer) was used here to remove some of the outer rock (matrix) around the trilobite.
|
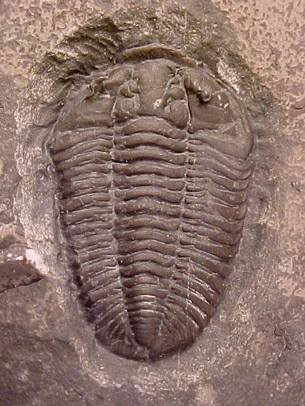
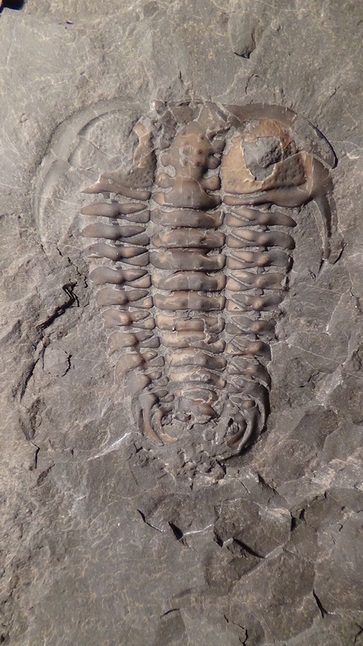
Now an air eraser (mini sand blaster) was used to clean up the small bits of rock stuck to the trilobite. Not surprising was the absence of a head (cephalon) as is the norm for the Bathyurus trilobite.
|
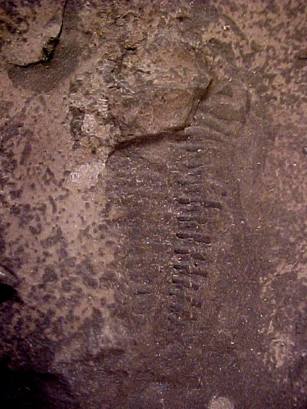
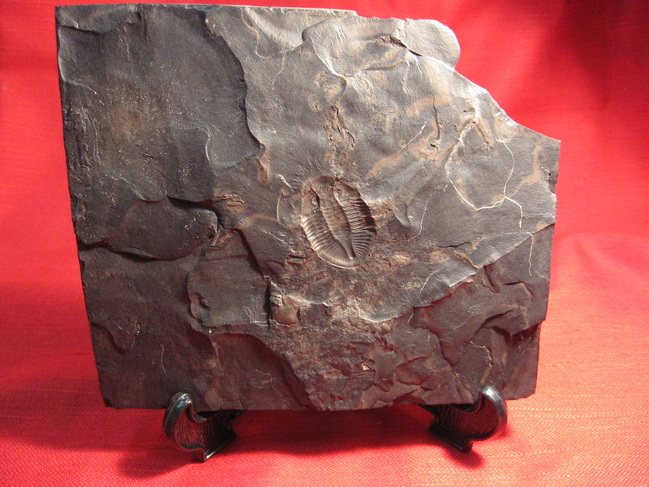
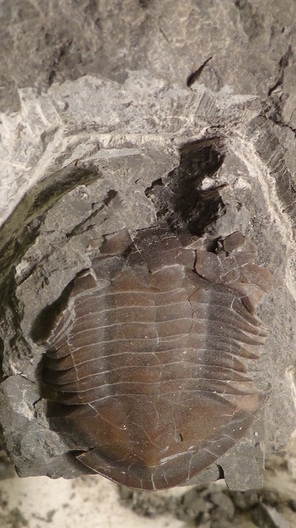
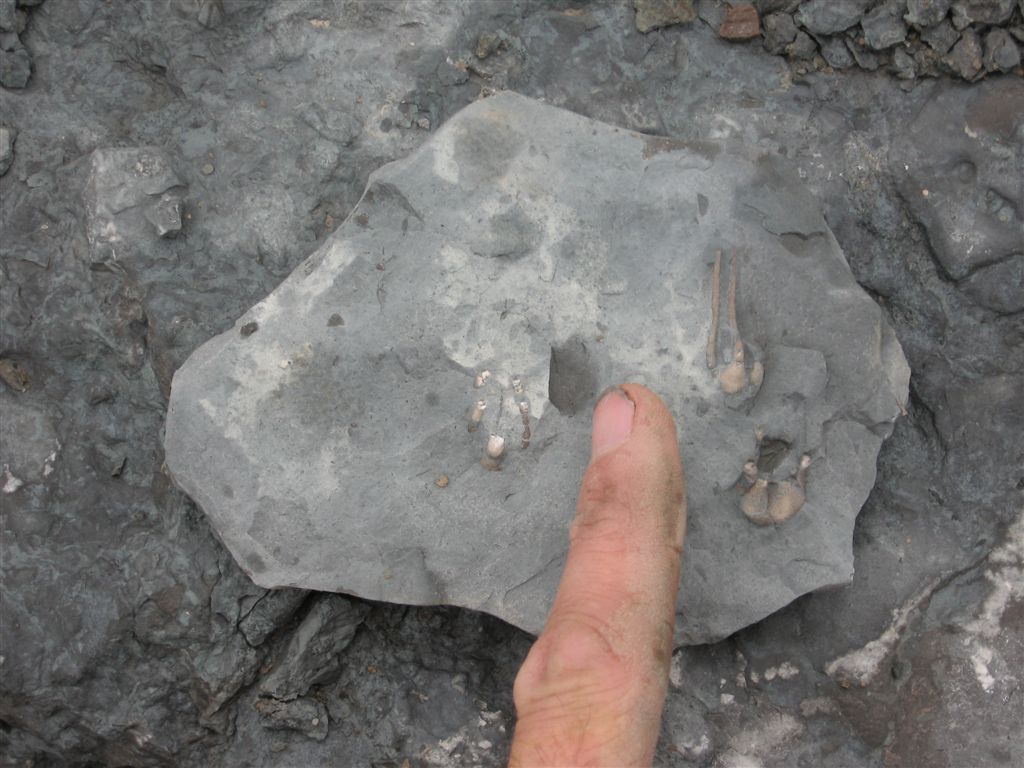
A Bathyurus trilobite pygidium as found on site.
|
Freeing the rest of the pygidium from the matrix with the air scribe.
|
And finally a clean-up with the air eraser.
|

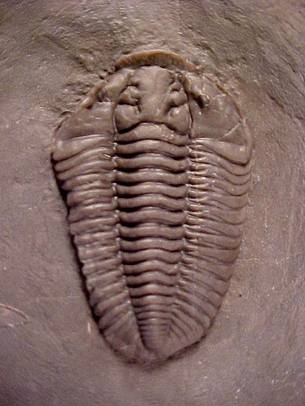
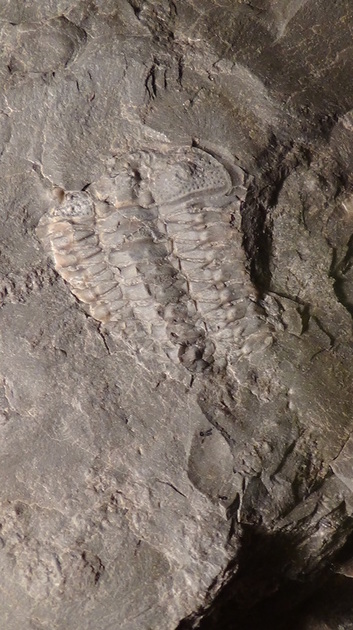
Here is a Isotelus trilobite pygidium.
|

Removing the rock to reveal the complete tail.
|
And some air erasing for a final touch.
|
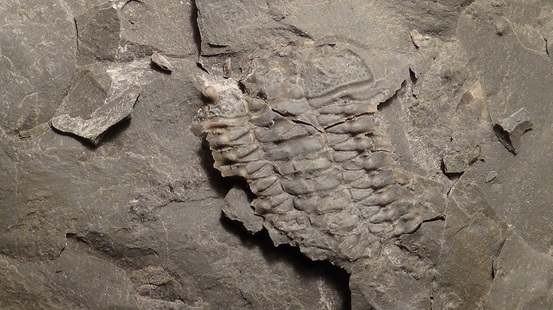
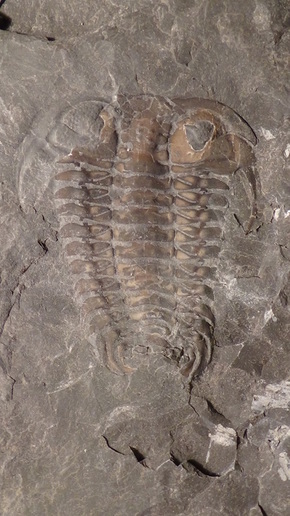
Here the opposite was found. A Bathyurus trilobite head peeking out of the matrix.
|
A bit of air scribing to reveal that there is no body under there.
|
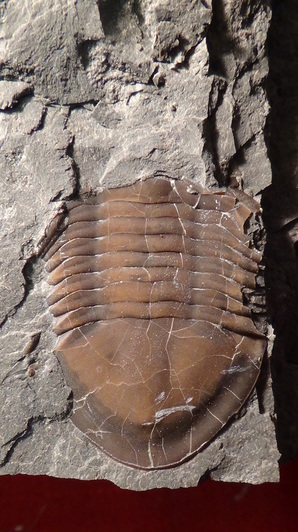
and an air erase clean-up putting a shine on the shell (exoskeleton).
|
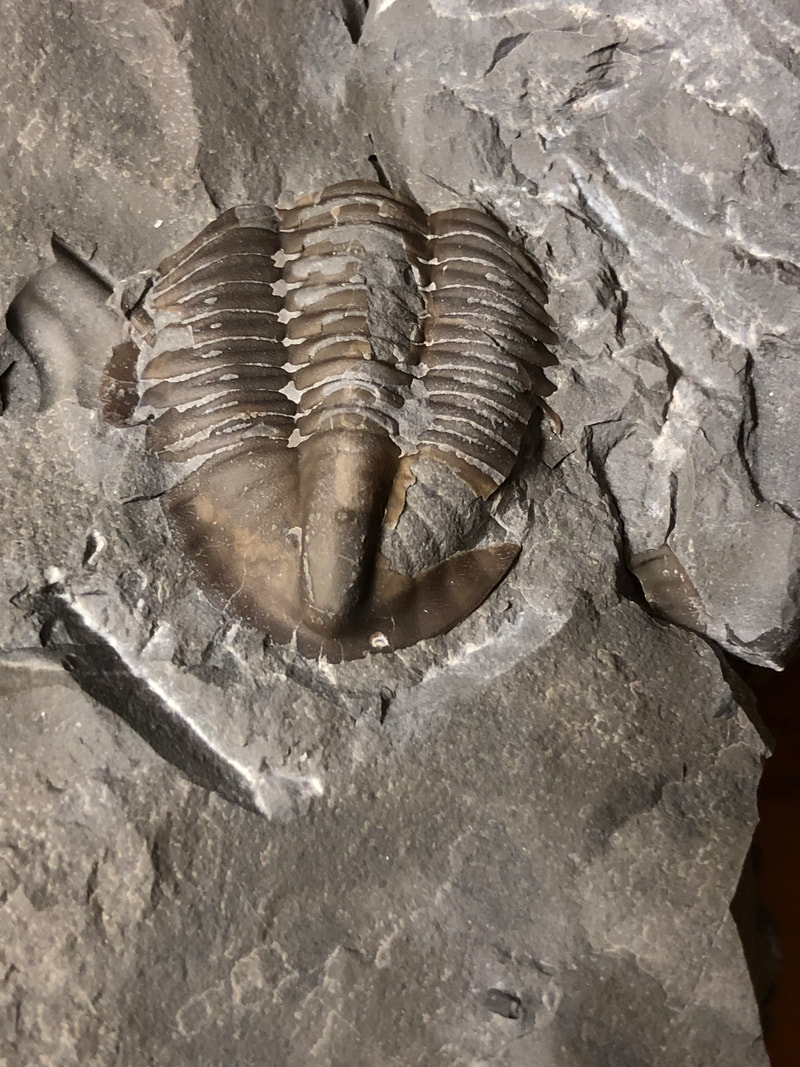
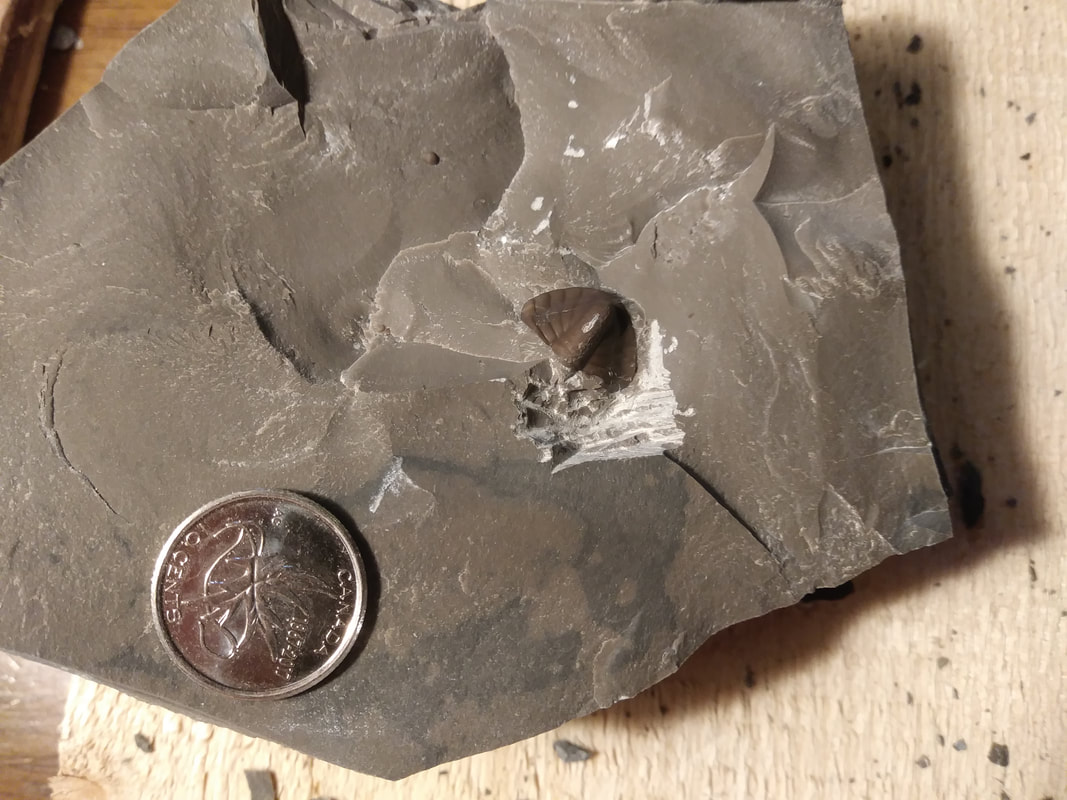
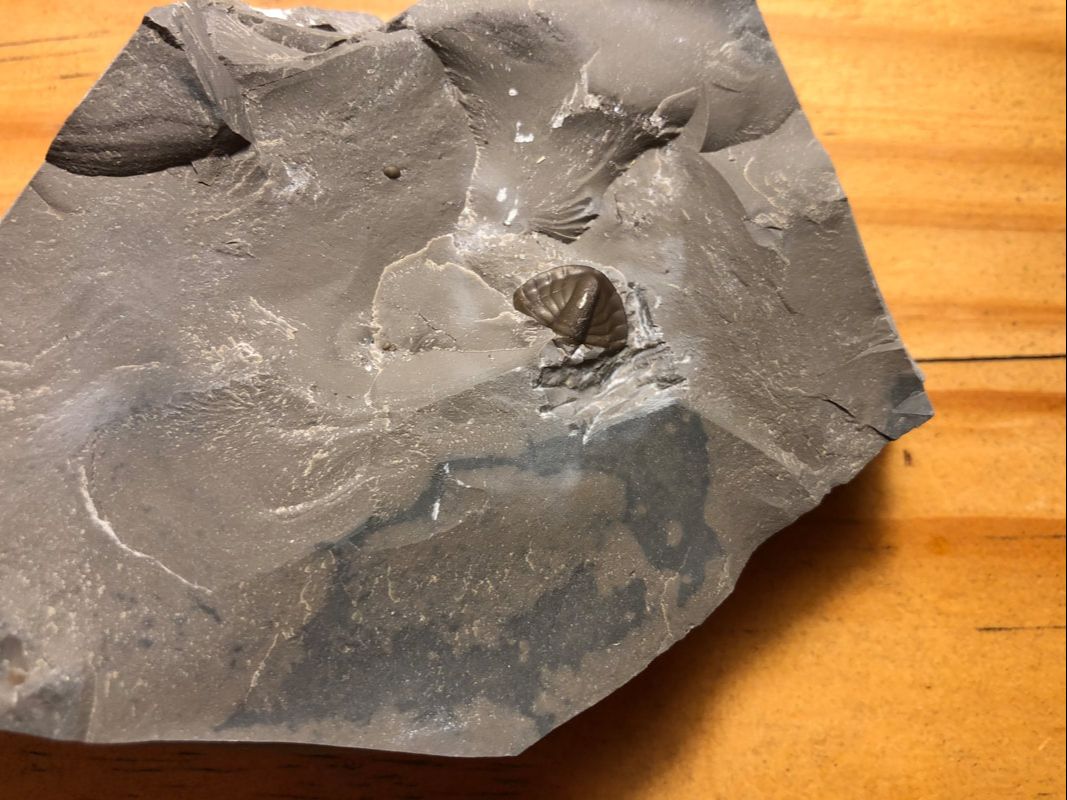
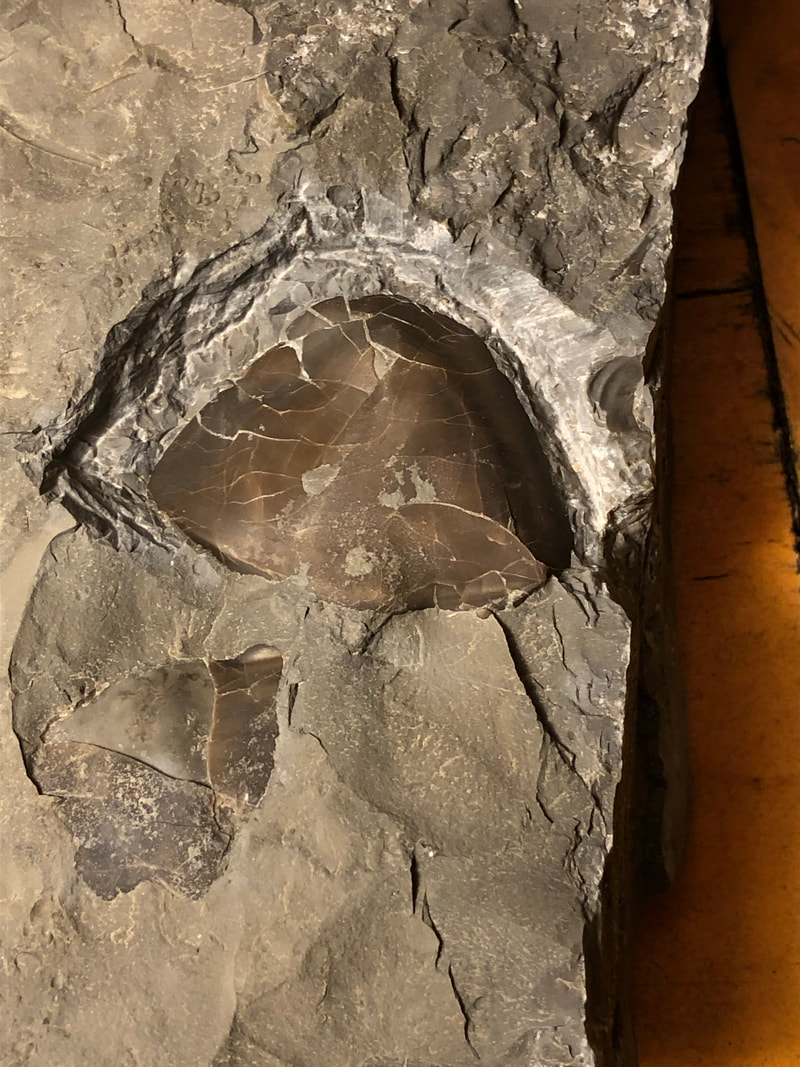
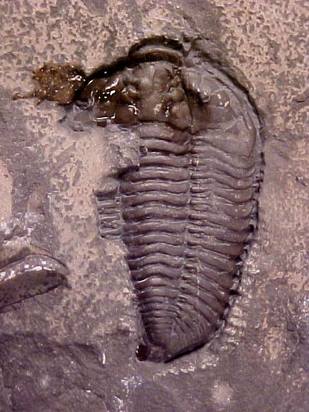
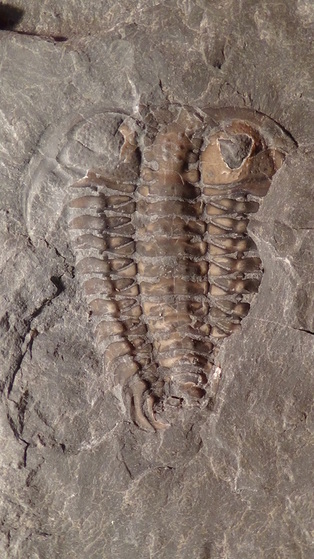
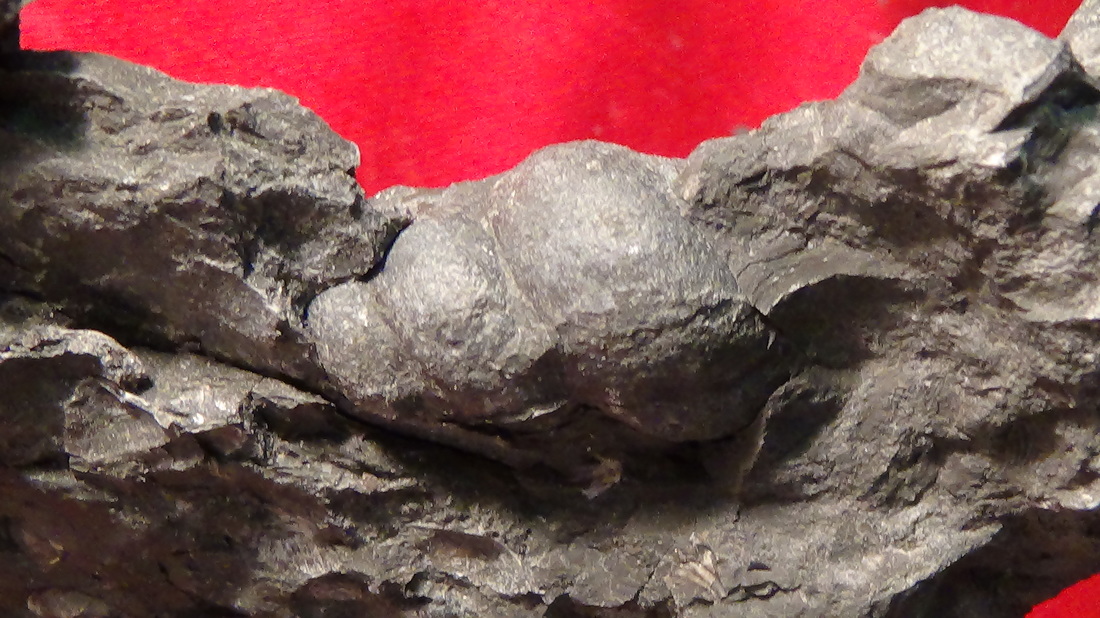
Here is a contorted Bathyurus trilobite.
|
I was hoping this would be a complete one but it was not to be.
|
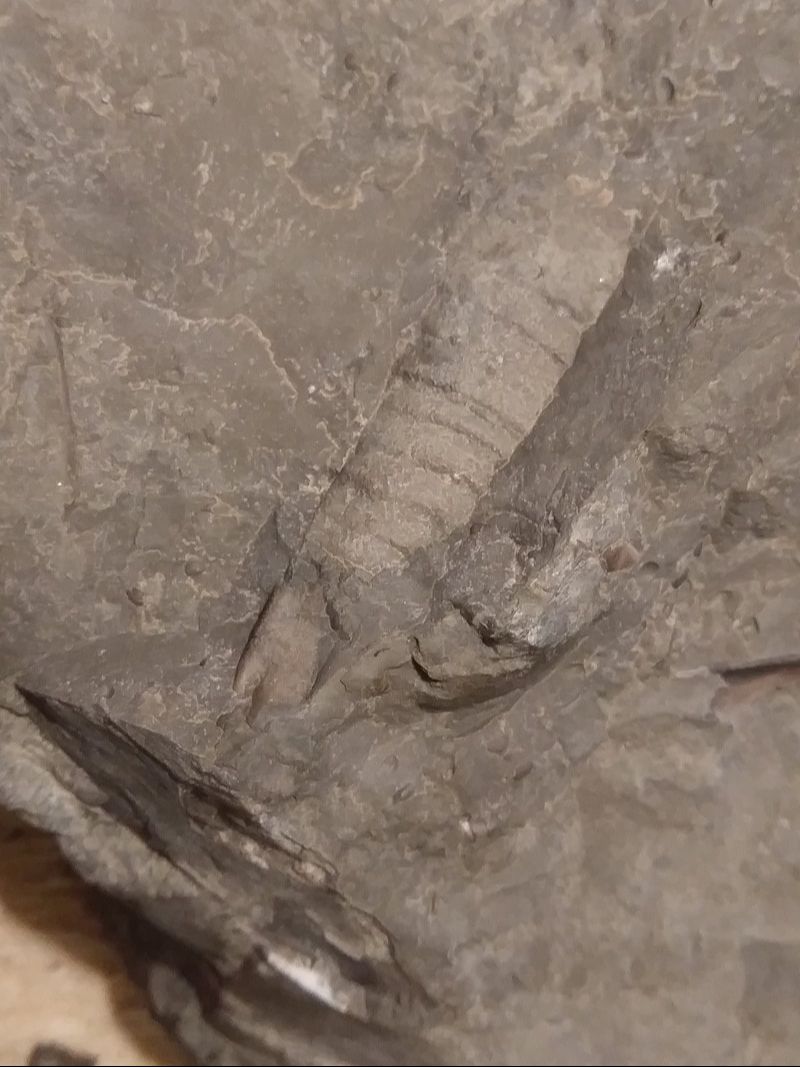
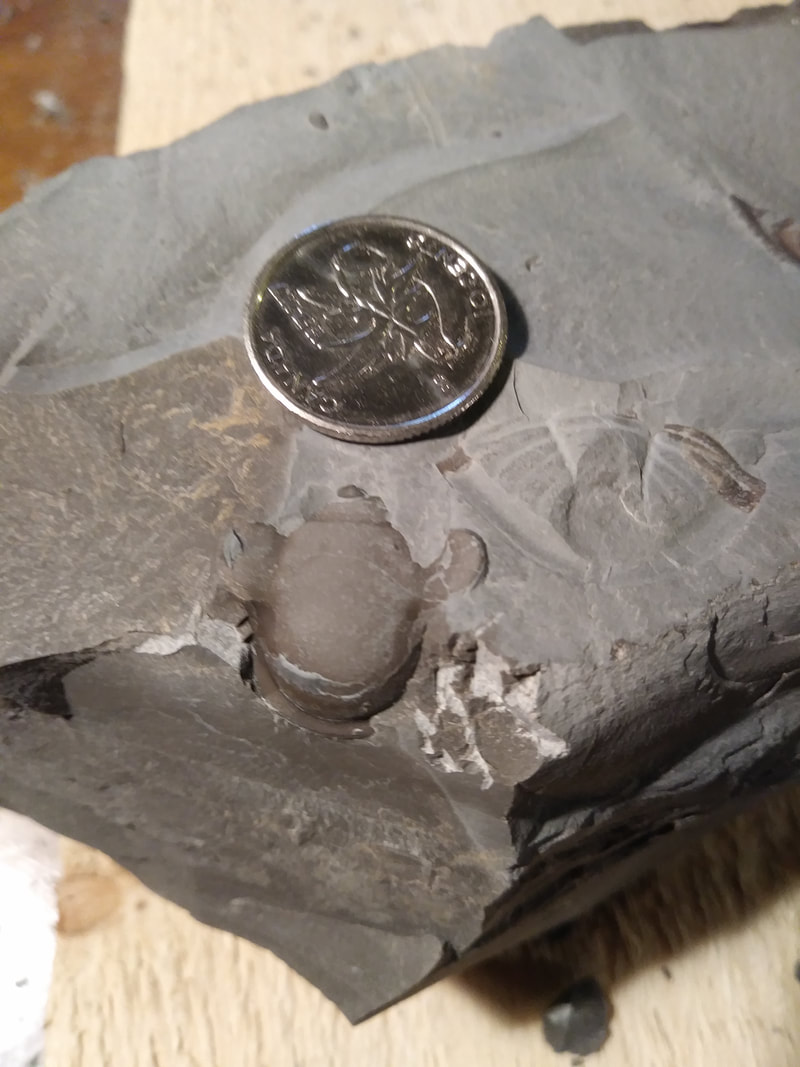
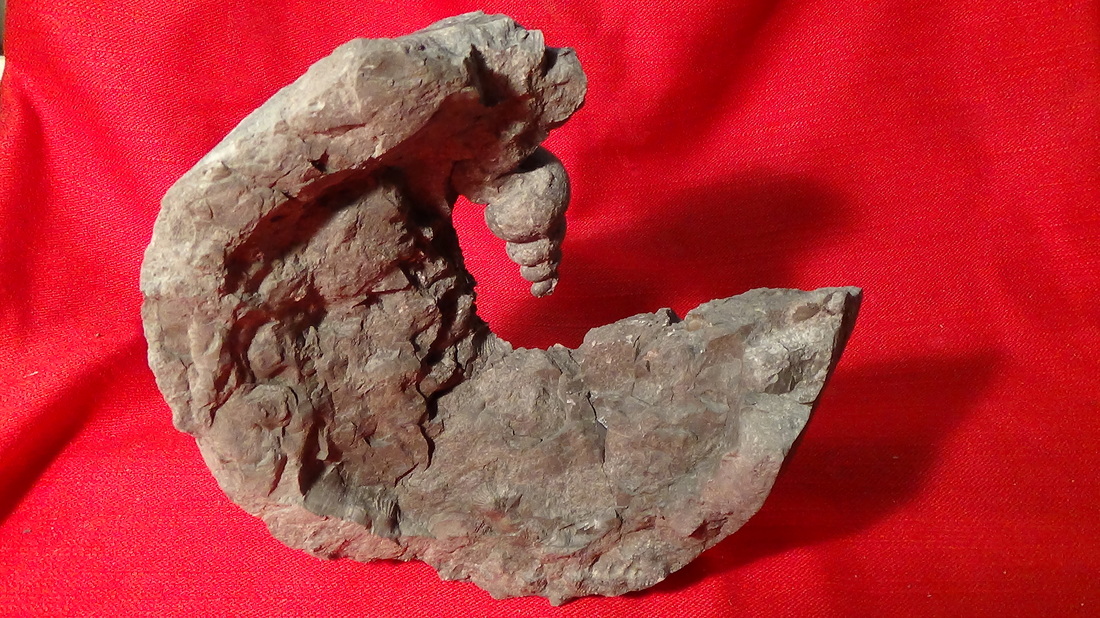
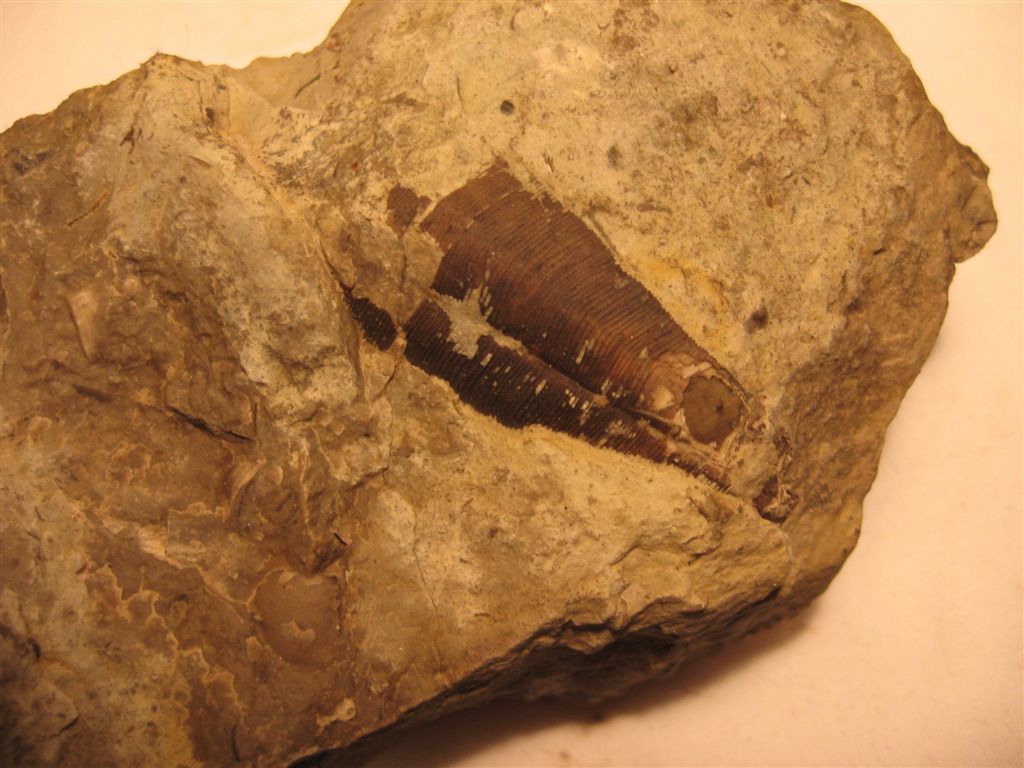
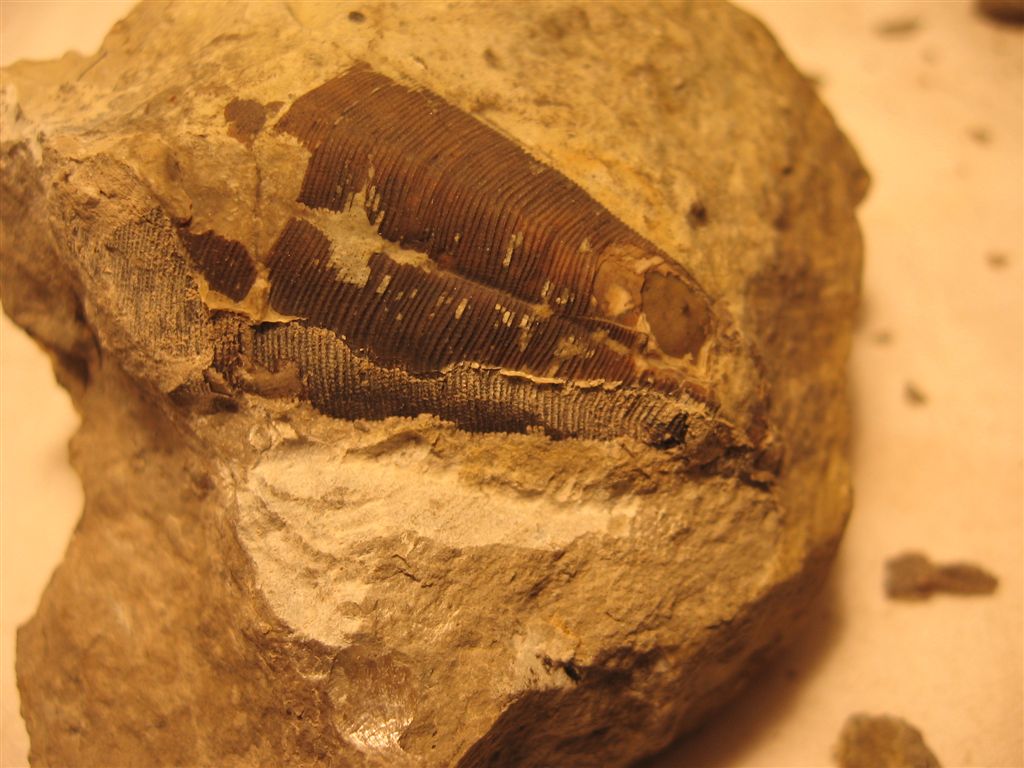
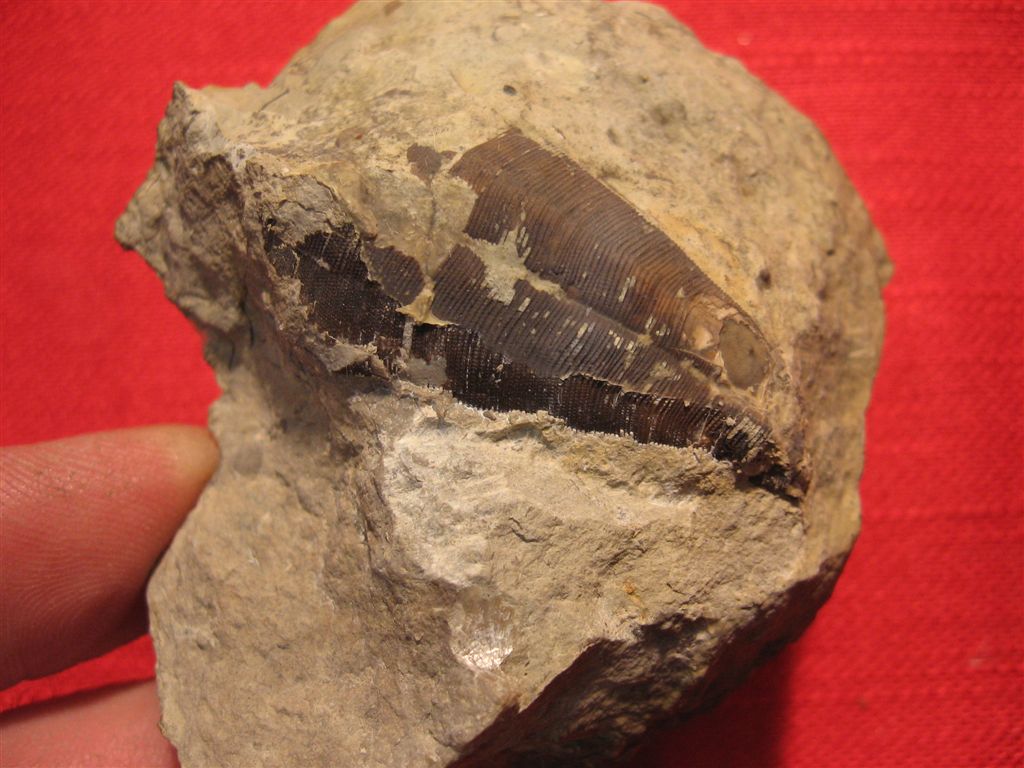
A fossil orthocone partially peeking out of the rock.
|
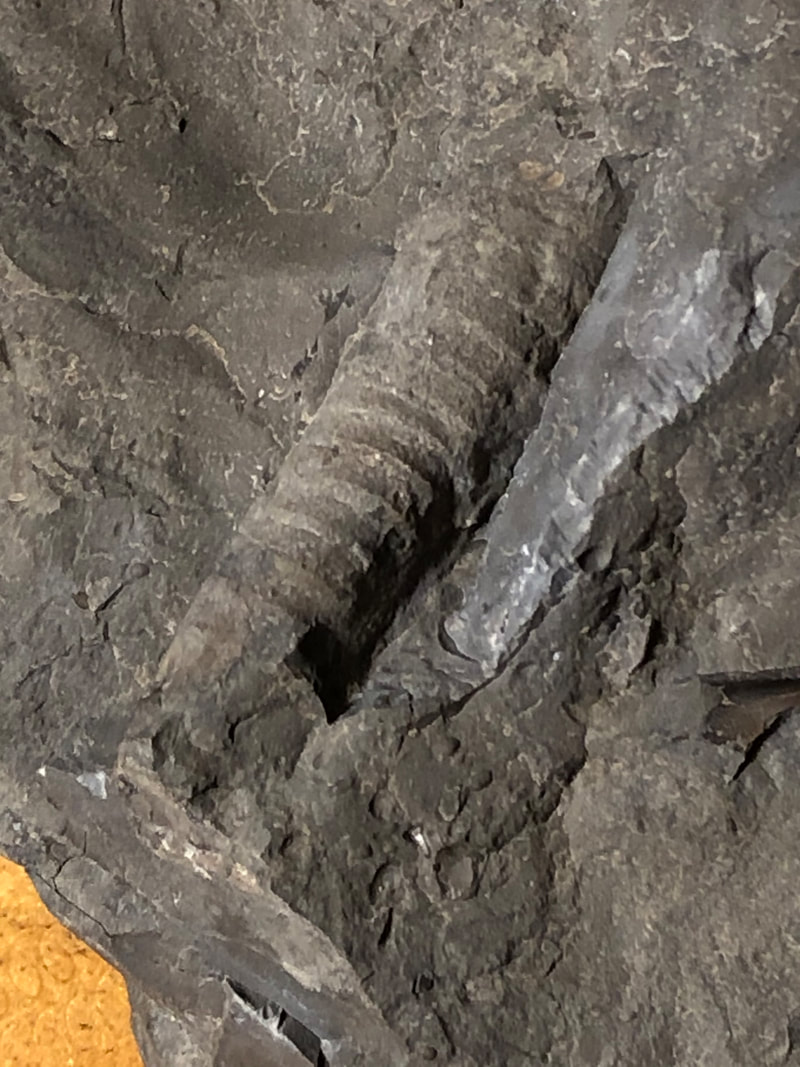
I was able to free it out somewhat and without risking any damage to it, I stopped there.
|
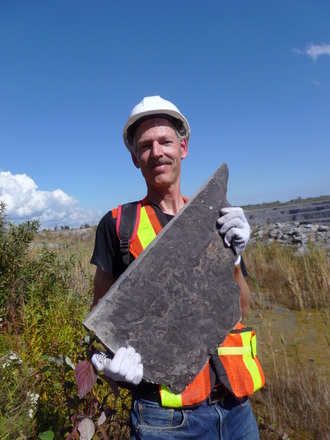
Here is a man that needs no practice in fossil prepping!
Below a succession of 6 photos of a trilobite being prepared by Kevin Brett using an air scribe and an air eraser. If you think your fossil can be cleaned up by fossil preparation contact Kevin at: [email protected];
Below a succession of 6 photos of a trilobite being prepared by Kevin Brett using an air scribe and an air eraser. If you think your fossil can be cleaned up by fossil preparation contact Kevin at: [email protected];
|


|
FOSSIL PREPPING 2015
In the Winter with the snow flying it's always a good time to catch up on some inside projects. One of them was working on a trilobite fossil found at St. Marys Quarry last Fall.
Martin Legemaate at St. Marys Quarry last Fall holding a brittle oil shale slab with a complete trilobite fossil on it. Cutting it smaller without proper preparation would have destroyed the trilobite.
The smaller negative impression will need a cut to
match the positive impression. 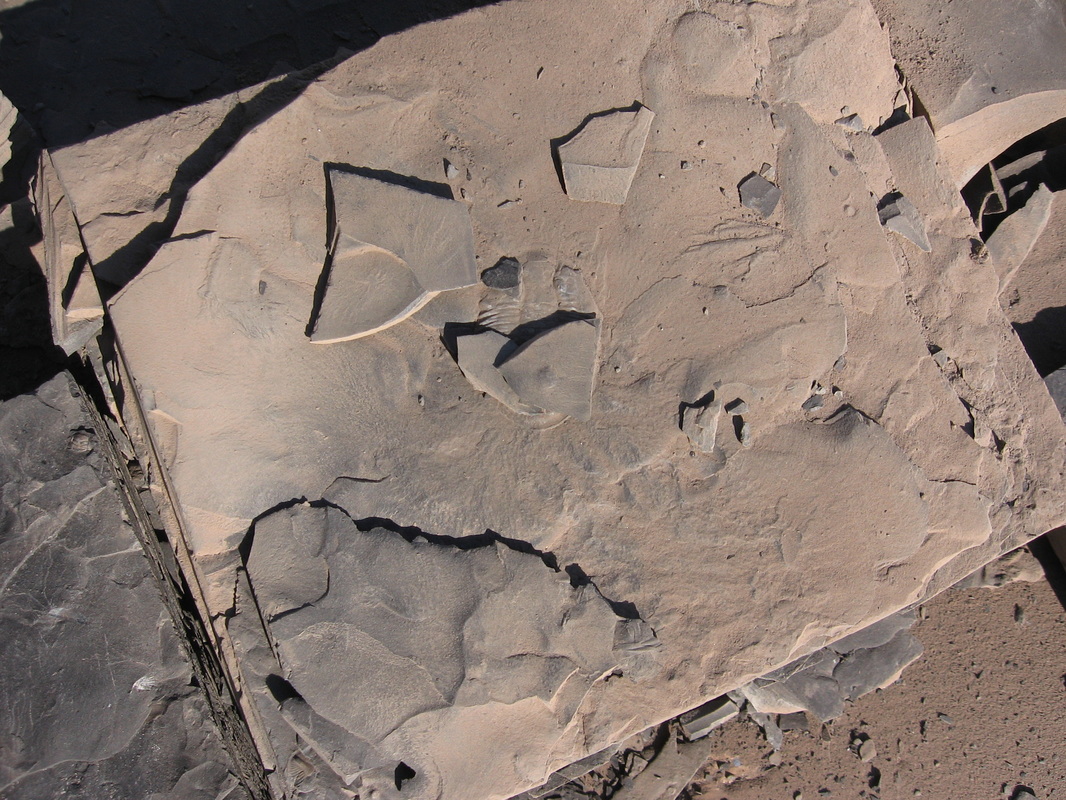
Here is the positive impression part of the trilobite.
Did it survive? |
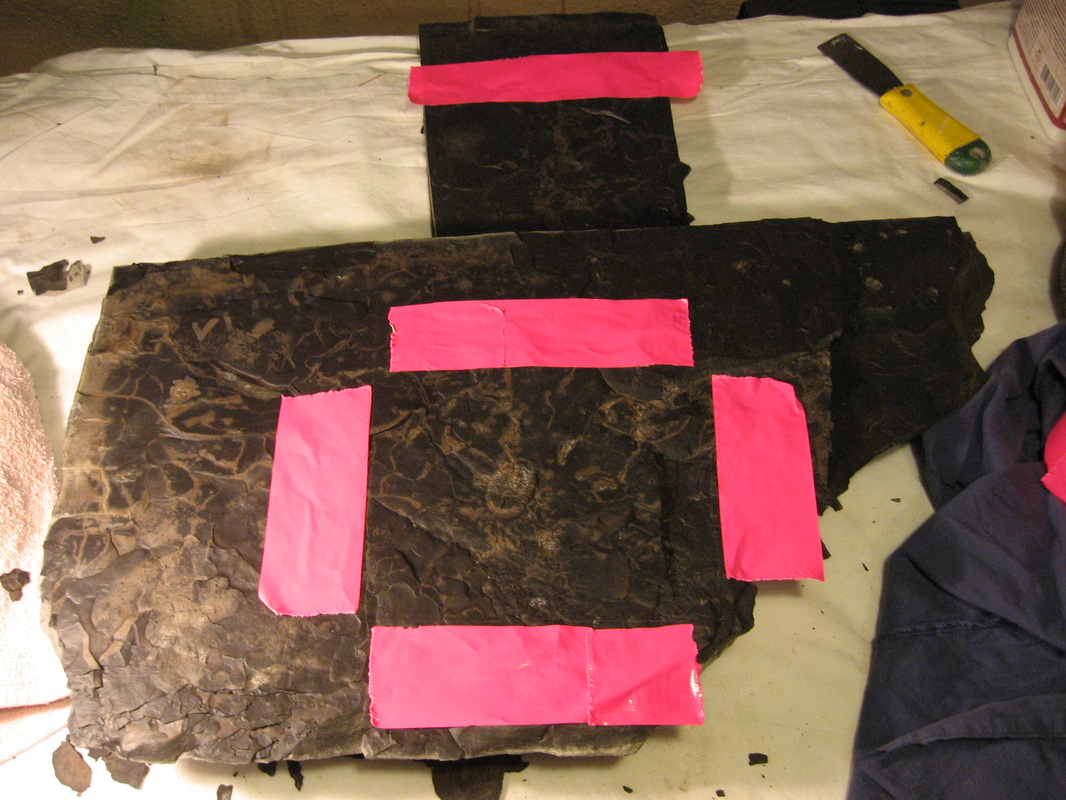
After a long search an adequate product was found to coat the surface of the slab to reinforce the shale so when cutting it won't fall apart. After coating the surface, the area to be cut
was taped off. 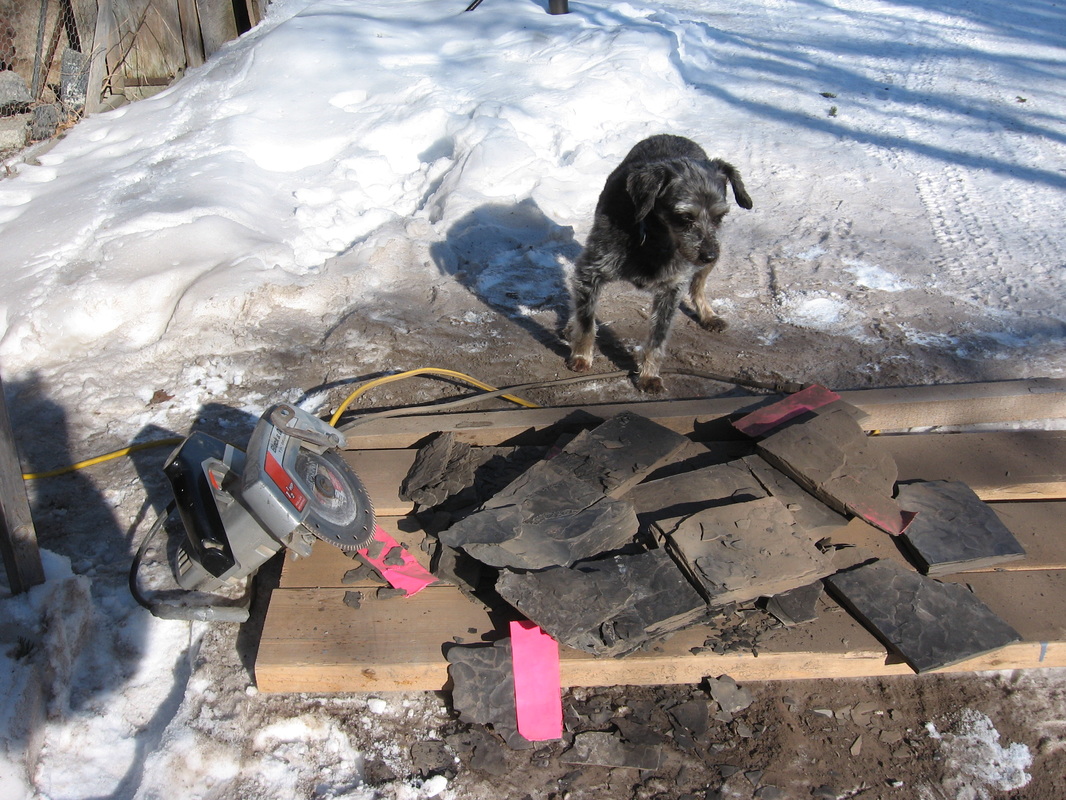
-5 degrees celcius (23 fahrenheit) was warm enough to tackle the cutting stage of the fossil preparation. Our dog Pepper viewing the mess left by the cutting. The shale was separating all over the place.
Move the bits of shale away and YES! Still intact. The negative impression also faired well. Now to wash them, let them dry out a few days and then recoat them with a dead flat varnish.
|
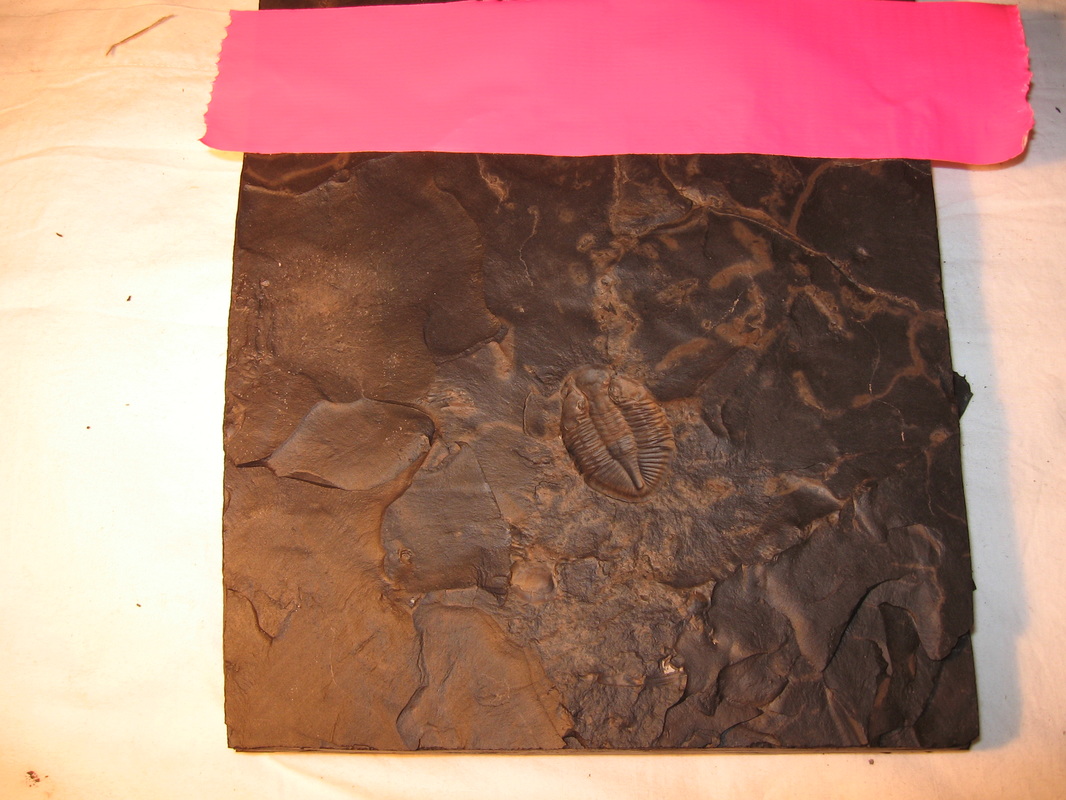
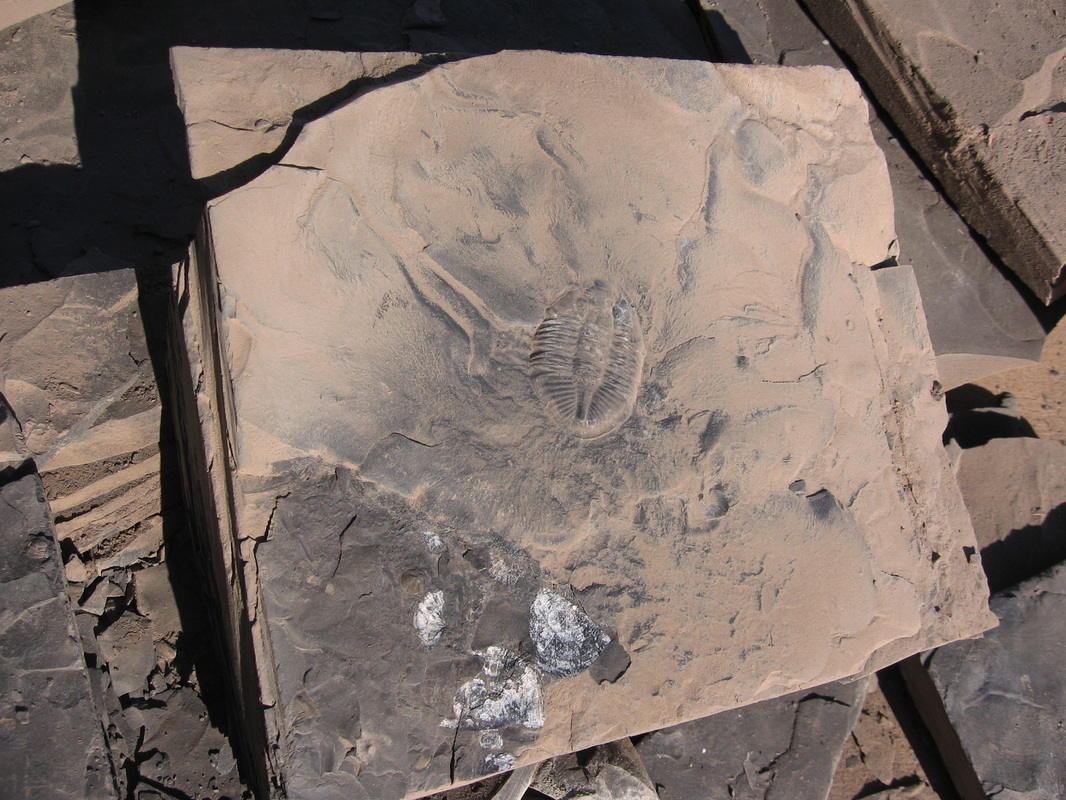
Positive impression (pseudogygites latimarginatus).
After a wash and dry and a re-varnishing they turned out superb. The sides were also varnished to prevent further splitting.
Do I hear $50 for the pair! $50 thanks, how about $60, yes $60, anyone for $70.............
After a wash and dry and a re-varnishing they turned out superb. The sides were also varnished to prevent further splitting.
Do I hear $50 for the pair! $50 thanks, how about $60, yes $60, anyone for $70.............
Negative impression.
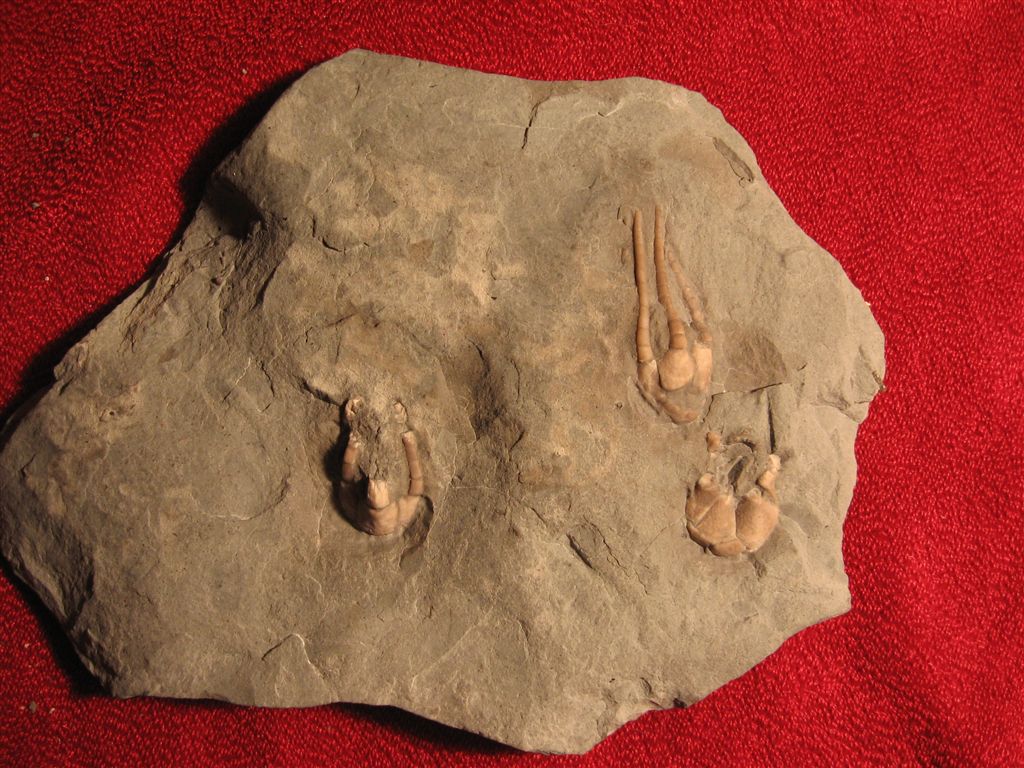
Three more trilobites collected in the Fall at St. Marys Quarry needed different levels of prepping and the first one required and air scribe. It runs off an air compressor and works like a mini jack hammer chipping the stone away but also providing vibration to separate the stone from the fossil. Generally a rock’s weakest point is along the surface of a fossil.
(scroll down to older posts for more details on equipment).
(scroll down to older posts for more details on equipment).
The first to prep was a small ceraurus trilobite. It was partially embedded in the matrix (surrounding rock) which needed to be removed but I didn’t have much hope because the exoskeleton had separated from the trilobite due to the blast. The exoskeleton is what gives it strength through the prepping process.
Sure enough when using the air scribe the thing just fell apart. It’s a mixed bag when prepping a fossil.
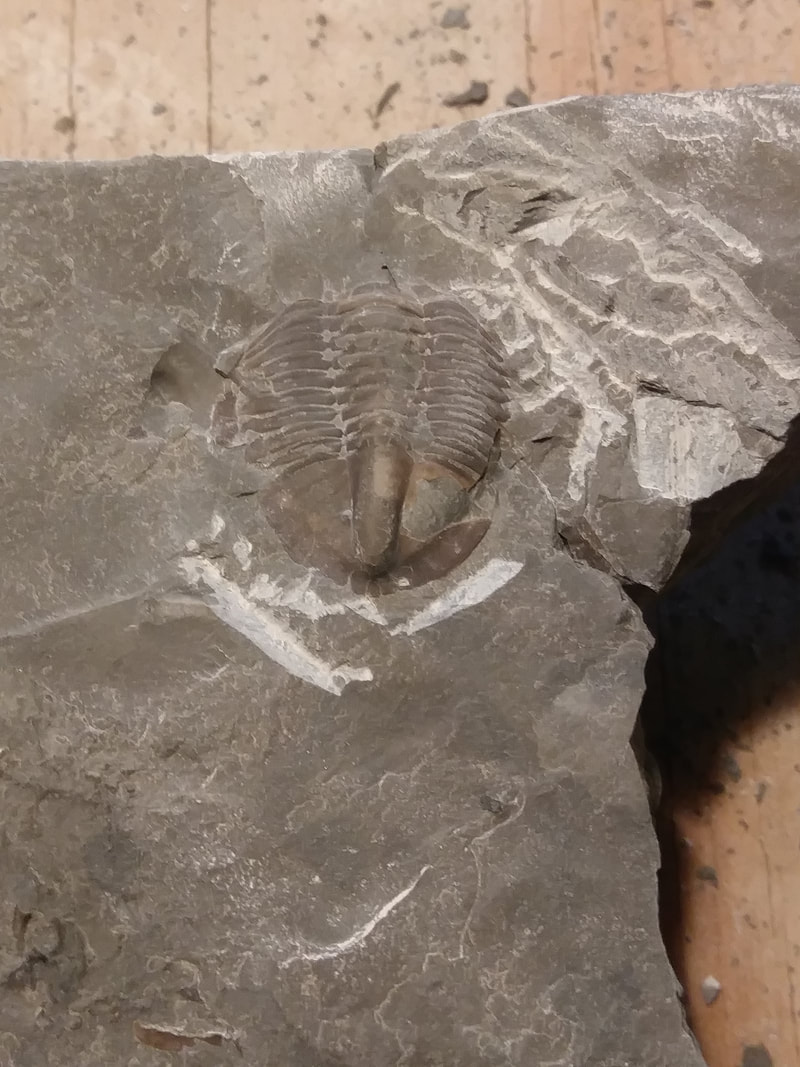
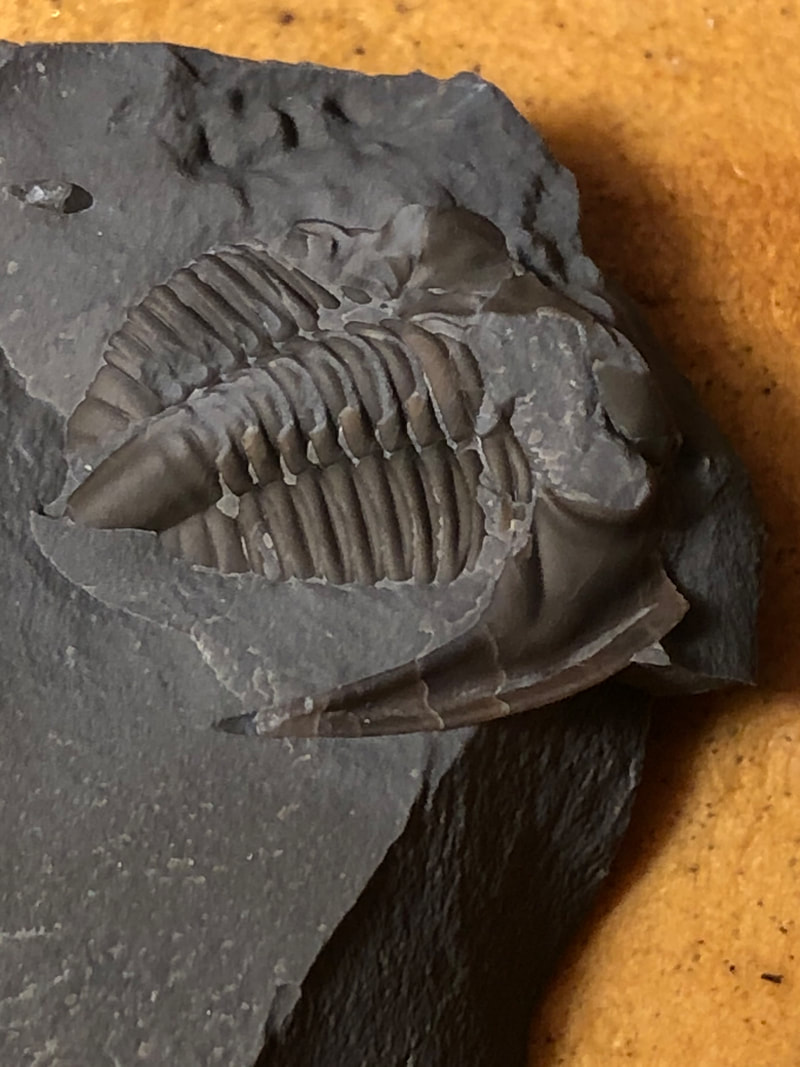
This next one was interesting. A great find is a complete trilobite of course but many trilobites are found separated in pieces usually in 3rds, however don’t let that stop you from collecting them because trilobites can roll or fold up. The rest of your trilobite piece could be underneath or in the matrix. Using the air scribe on this isotelus trilobite will hopefully reveal the head on the other side.
Tail (pygitium) and middle (thorax) section of an Isotelus (gigas) trilobite found "as is" in the quarry.
Indeed the head was there and folded over with two eyeballs looking back at me. With care I was able to free it from the matrix sufficiently then giving the rest a coat of varnish for strength. No further prepping with the air eraser was needed because the exoskeleton was very clean. Photo: Tail (pygitium) and middle (thorax) section of isolelus trilobite.
|
It appeared as though the head was present and starting to curl under however the exoskeleton was in poor shape and was breaking up so I has to stop and coat the existing exoskeleton with a coating of clear flat varnish to strengthen it. An hour under a light bulb and it was dry and ready for prepping again.
Here's lookin' at you kid! Flip side showing the head (cephalon) section of isotelus trilobite. Another great specimen for a creation museum because like the pill bugs we find on the basement floor trilobites rolled up when in danger or frightened. Rolled up trilobites are found in the rocks all over the world indicating the earth went through a world wide scare. Better known as a “Catastrophe”.
|
The third trilobite was in fairly good shape already when found. Part of the lateral border exoskeleton was missing on the head but the imprint was still there. Some use of the air scribe was needed to expose the rest of the right side.
2nd ceraurus trilobite as found in the quarry
(Leviceraurus mammilloides). |
The rest of the trilobite was exposed so now to the air eraser. This will remove all the chip marks caused by the scribe and also remove more rock around the exoskeleton and polish it up a little. Note white chip marks.
|
Now on to the air eraser. Also working off an air compressor this little tool shoots out abrasive powders similar to a sand blaster but on a very delicate scale. Powders used are calcium carbonate, alumina hydrate and dolomite. An air eraser must be used in a negative pressure blasting cabinet, sucking the abrasive materials away because most of the abrasives are harmful to breathe. Scroll down to earlier posts for more details on an air eraser.
I removed a little more rock from the tail with the scribe and finished up with the air eraser leaving a cleaner deeper look.
Not a pristine specimen but well worth the effort!
Pray and support Creation Research so that we can continue to collect and clean
fossils for our museums to further the evidence for Creation and Catastrophe!
Psalm 111
2 The works of the Lord are great,
Studied by all who have pleasure in them.
New King James Version (NKJV)
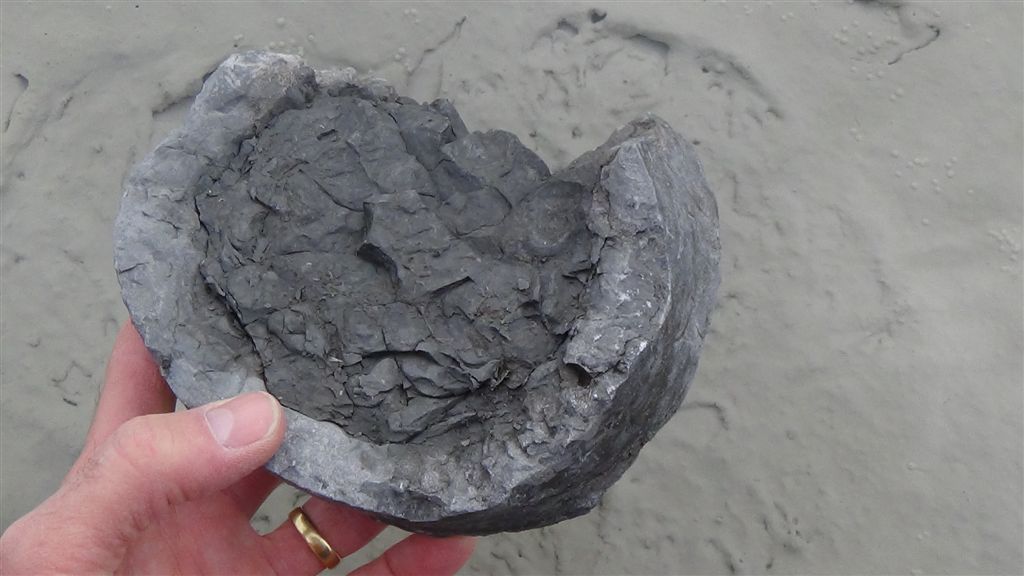
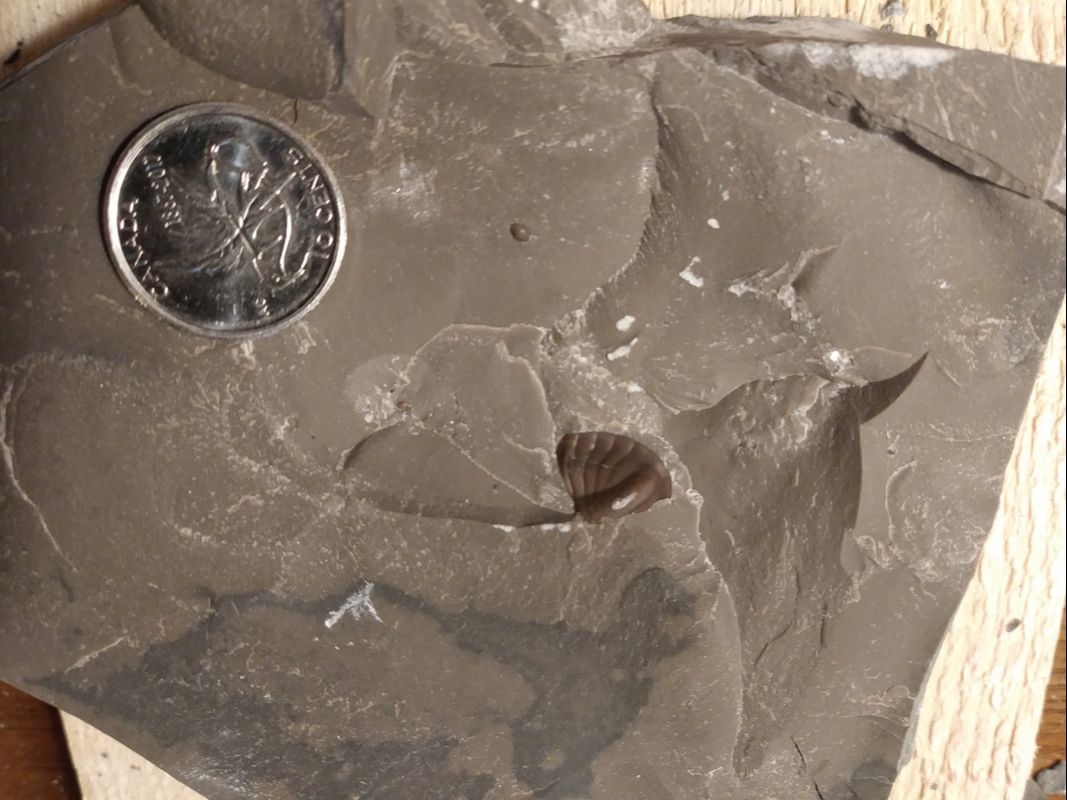
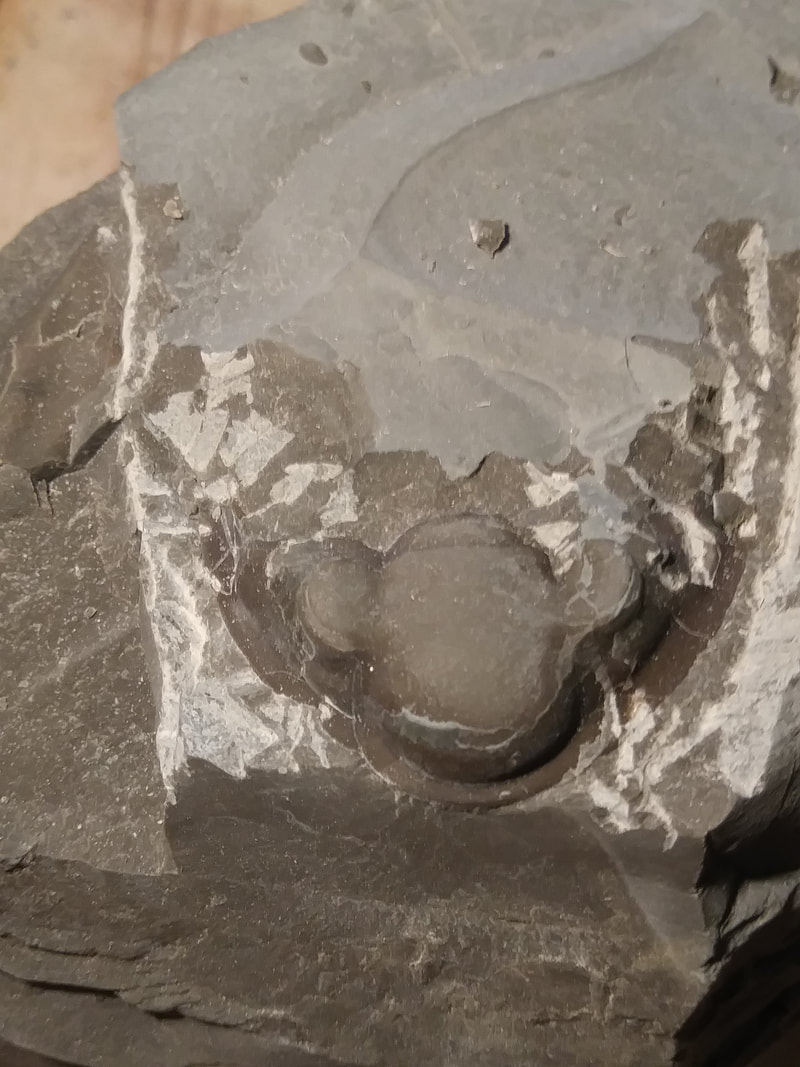
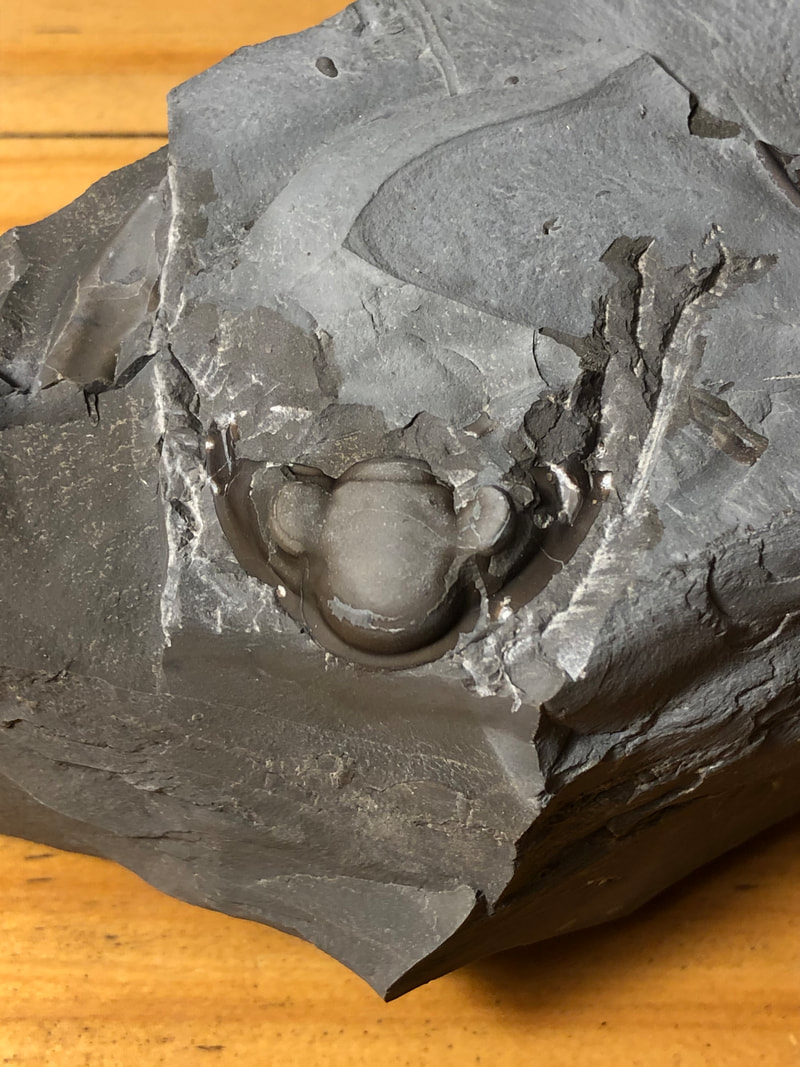
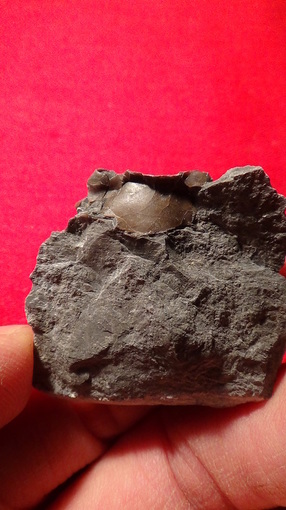
Also taken home from St. Marys Quarry was this ringed stylolite. What's a stylolite? Find out in the Fall 2015 newsletter under
St. Marys Quarry. Click: FALL 2015 NEWSLETTER |
It had a gastropod in the interior of the ring and I wanted to remove it without wrecking the stylolite.
|
but after a while of using the air scribe it looked kind of neat with it in, almost artsy! I may take up a new direction in fossil art! When I posted this on facebook someone noticed a face. Can you see it? Here are some of the face book comments, It looks like the man on the moon ( I can see its face ) So cool! (Victoria). Okay, that is really cool, I see it too! (Yvonne). This is absolutely beautiful (Matt).
OLDER POSTS
Most of the local fossils in the museum after being washed are displayed as is, however some
require preparation to enhance the fossil. Below are a few ways to prepare a fossil.
require preparation to enhance the fossil. Below are a few ways to prepare a fossil.
Using a simple hammer and mini chisel method of just chipping away at the limestone covering the fossil. Crude but effective.
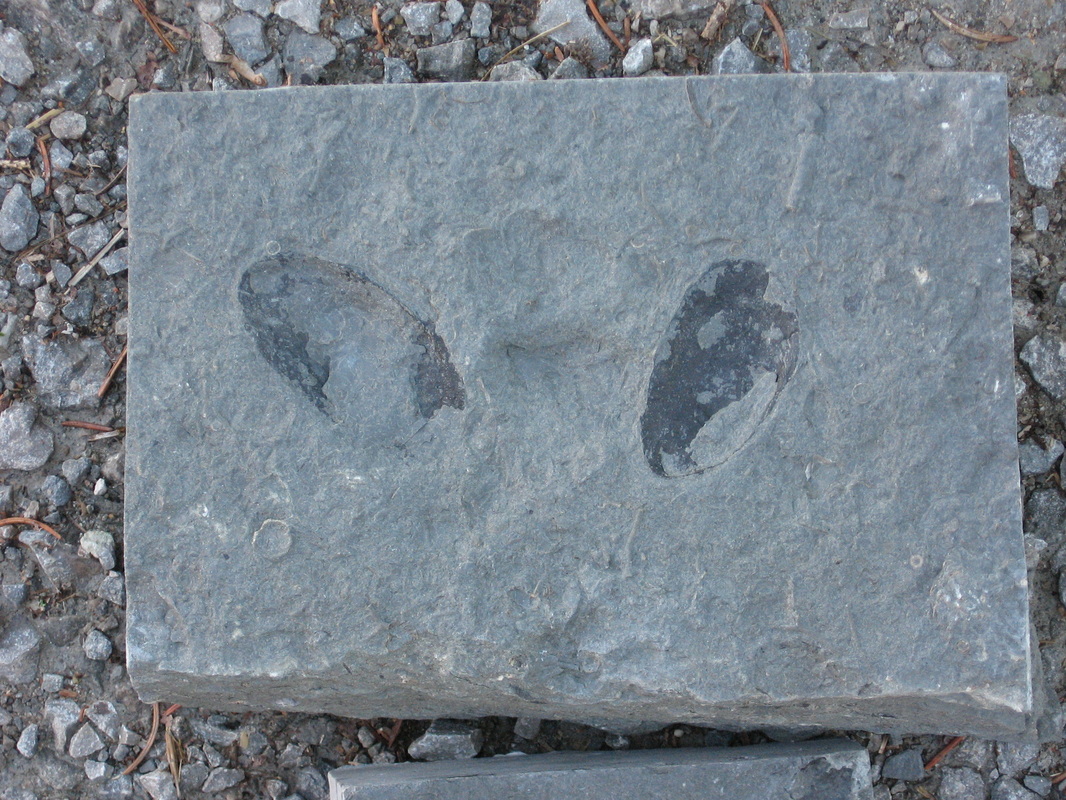
Fossil clam, before.
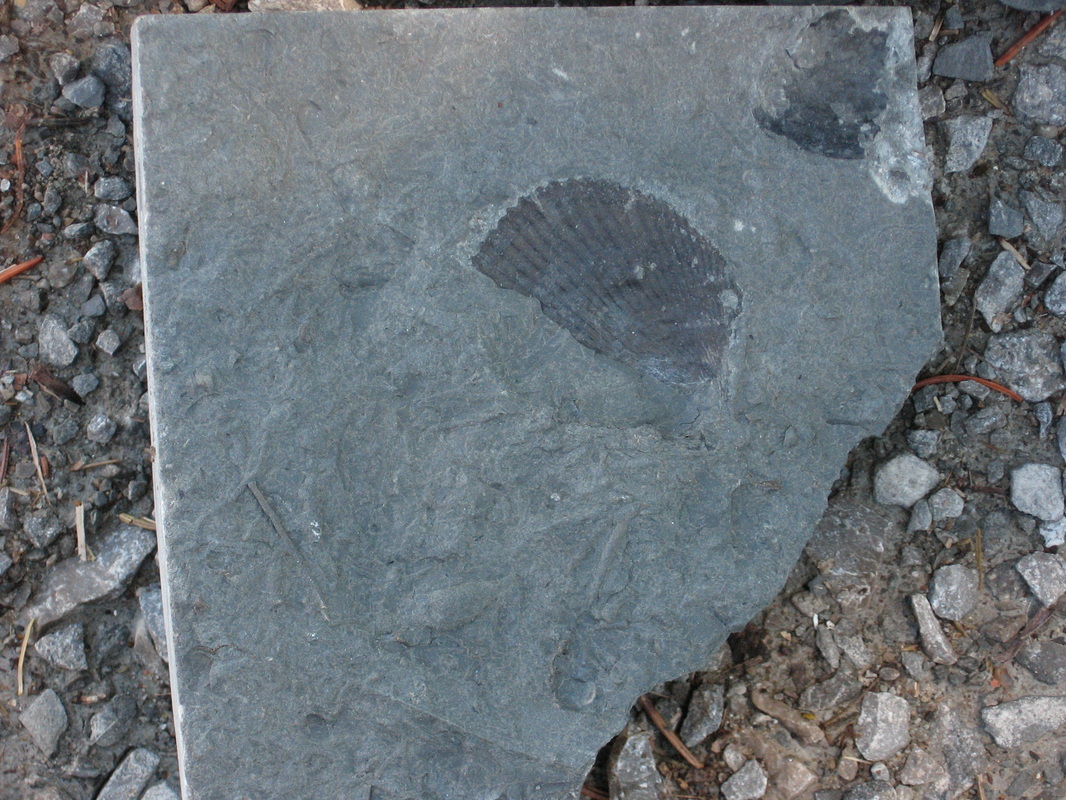
Fossil pelecypod, before.
|
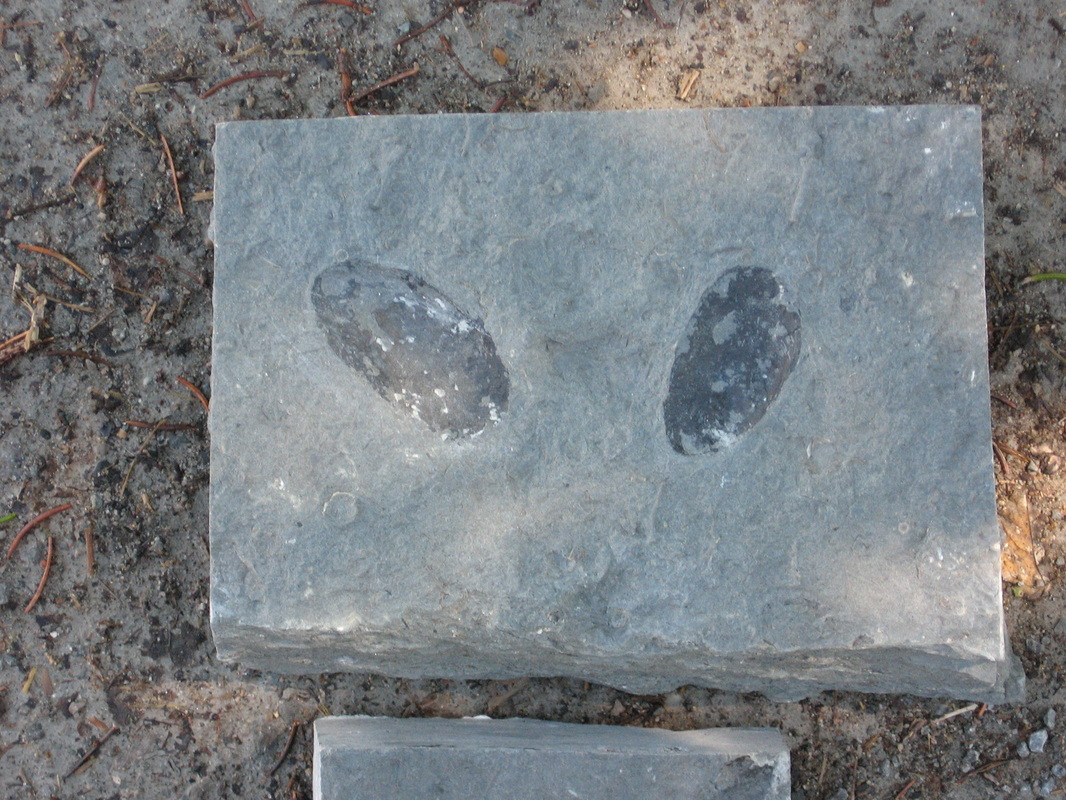
Fossil clam, after.
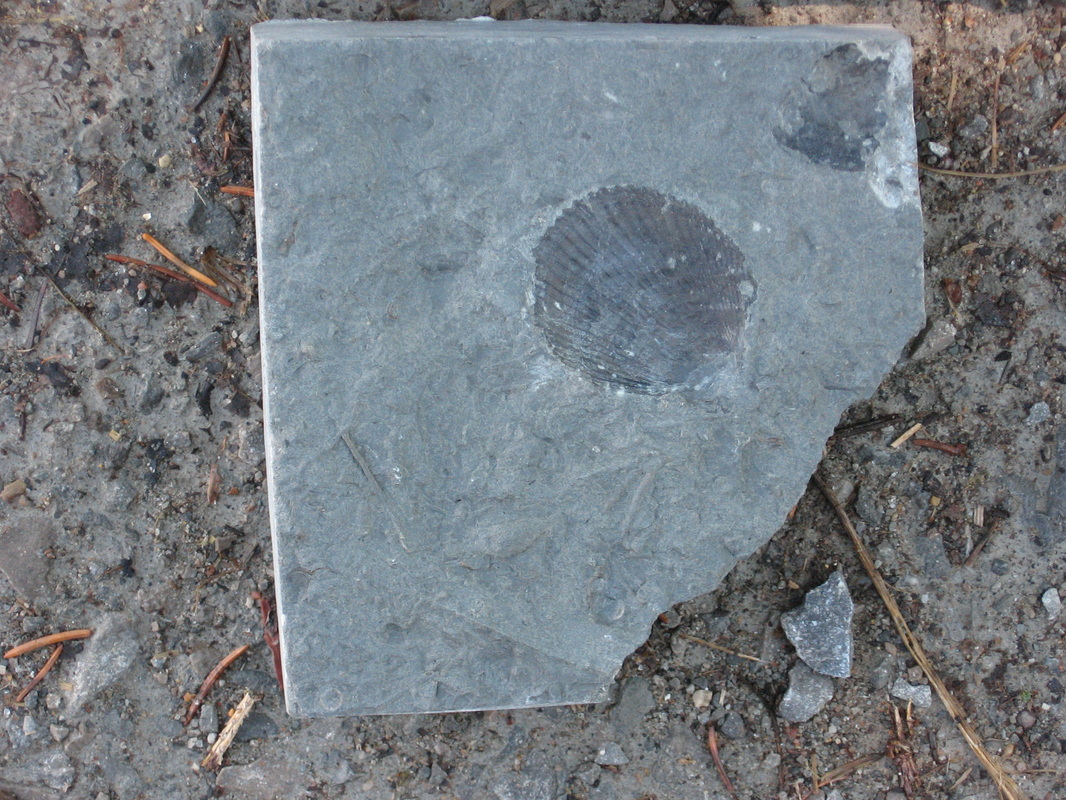
Fossil pelecypod, after.
|
Below using the micro sand blaster method. Preparation work done by Kevin Kidd.
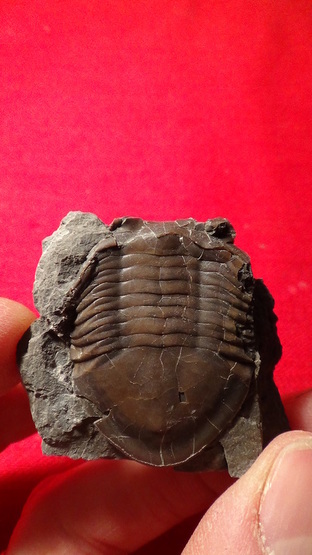
Trilobite (Ceraurus), before.
|
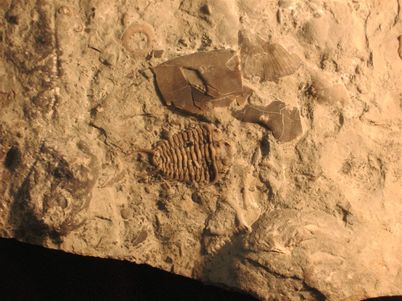
Trilobite (Ceraurus), after.
|
Crinoids (Hybocrinus timidus), as found on site
|
Crinoids, after
|
2013 UPDATE
Thanks to generous donation The Creation Research Museum will pursue purchasing a used micro sand blaster
and other associated accessories. Stay tuned for updates!
Thanks to generous donation The Creation Research Museum will pursue purchasing a used micro sand blaster
and other associated accessories. Stay tuned for updates!
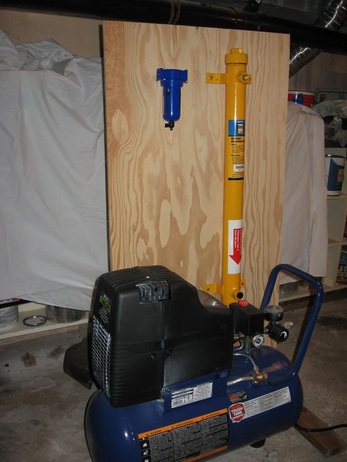
February
First of 3 phases. Purchase of compressor (above) and set up of air dryer and air filter.
Setup of venting using a kitchen vent for the suspended dust in the room and a simple
shop vac for removing the blasting material from the cabinet.
First of 3 phases. Purchase of compressor (above) and set up of air dryer and air filter.
Setup of venting using a kitchen vent for the suspended dust in the room and a simple
shop vac for removing the blasting material from the cabinet.
Summer
Tinkered with a small dental abrasive blaster I borrowed from a colleague but the both of us
could not get it to blast properly. Yup, dentists use the same devices on dentures and casts.
Tinkered with a small dental abrasive blaster I borrowed from a colleague but the both of us
could not get it to blast properly. Yup, dentists use the same devices on dentures and casts.
December
Second phase. After a long search for used abrasive blasters an air scribe came up for auction on Ebay.
After winning it by being the highest bidder it was shipped over from the USA in a few days. What is an
air scribe? It's like a mini jack hammer which chips the rock away from the fossil which prepares the way
for the finer detailing of the air abrasive blasting.
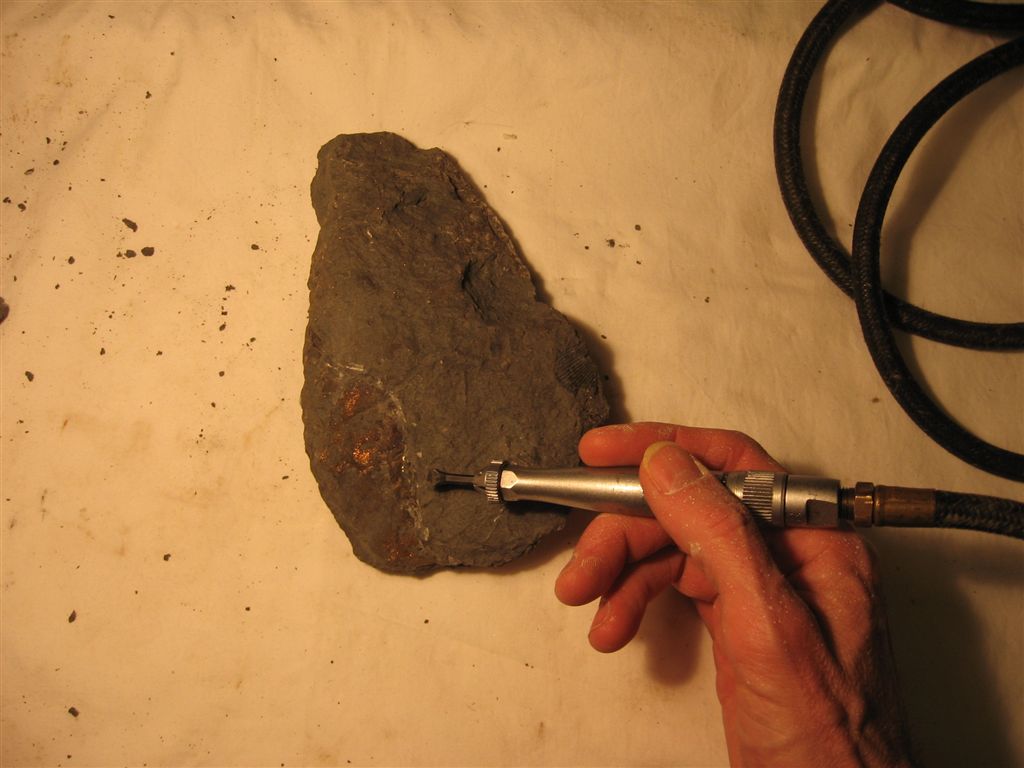
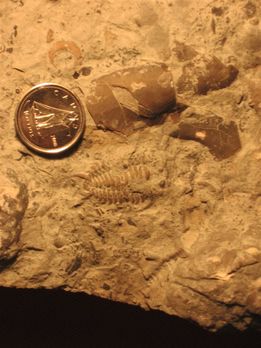
Chipping away the matrix to reveal a pyritized cephalopod.
|
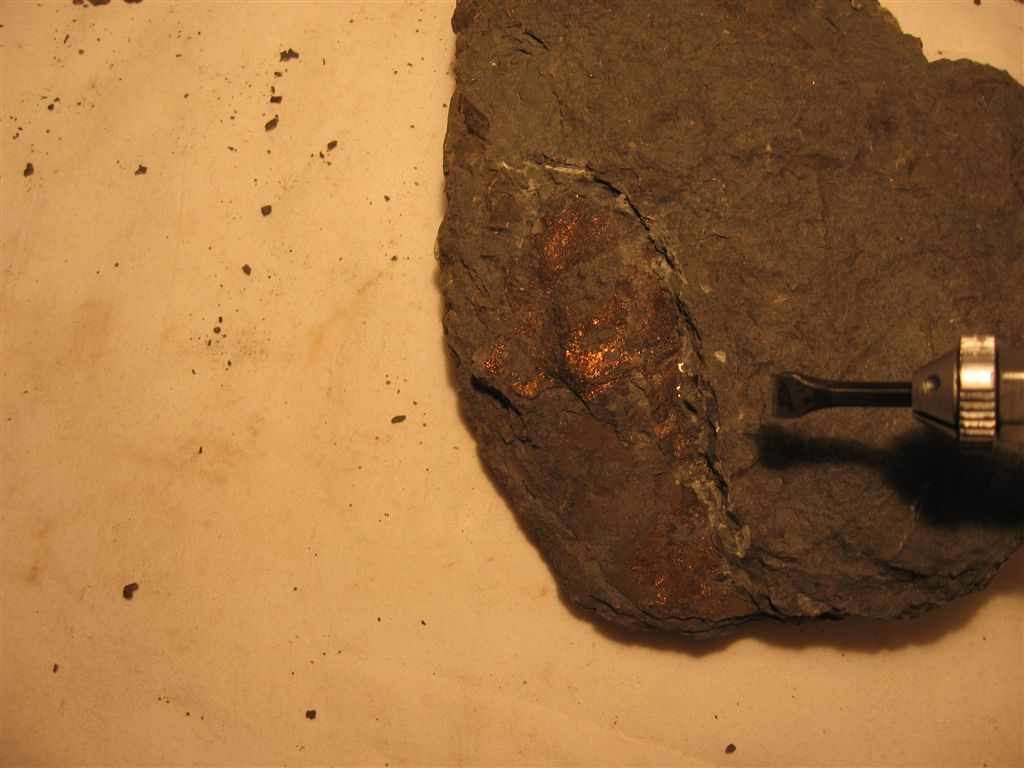
Close up.
|
Video demonstration of an air scribe
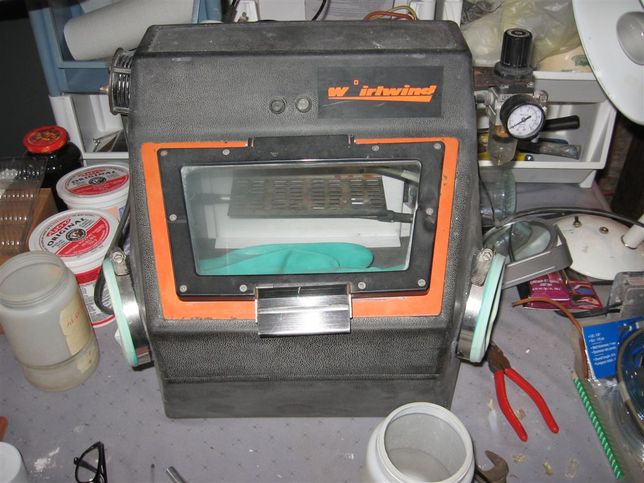
FEBRUARY 2014
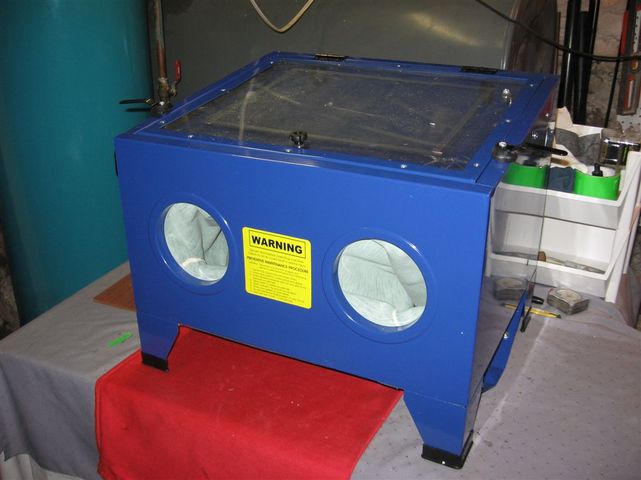
Purchase of an abrasive blast cabinet. A half price special deal!
Purchase of an abrasive blast cabinet. A half price special deal!
March
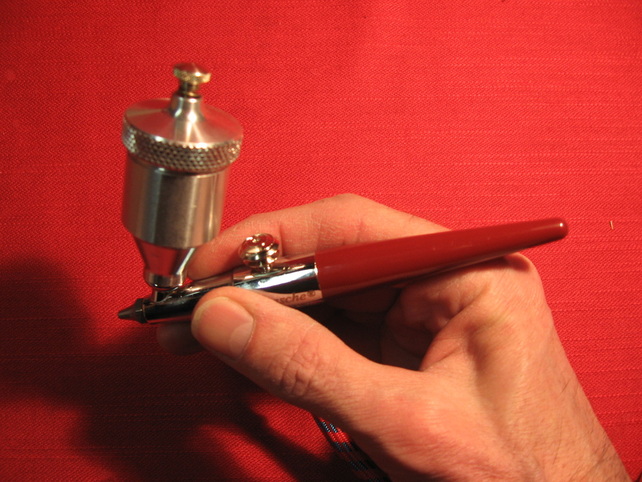
The final tool has arrived, an air eraser. This is the actual blaster where the abrasives come out of to remove the rock around the fossil. Thanks to Goodwood Baptist Church for the funds to purchase this part of the fossil prepping system!
The final tool has arrived, an air eraser. This is the actual blaster where the abrasives come out of to remove the rock around the fossil. Thanks to Goodwood Baptist Church for the funds to purchase this part of the fossil prepping system!
Watch for fossil prepping video coming soon
.Here is the first fossil prepared, a conularid using the new fossil prepping system.
The fossil as found. The bottom half is still embedded in the rock.
|
After removing the rock along the bottom with the air scribe (mini jack hammer) exposing another 25% of the fossil.
|
The fossil blasted with an air eraser to clean in up. Not a bad job for the first one!
|