FOSSIL COLLECTING TIPS
Keep an Eye on Your Tri…
Trilobite and other fossil collecting tips (part 1) by Martin Legemaate
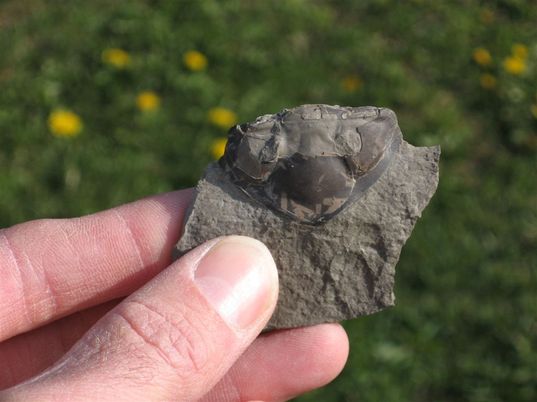
I guess I can be considered a seasoned fossil collector now but I had much to learn earlier on. One time I was walking along the Georgian Bay shore near Thornbury because I had heard it was a great fossil trilobite location. I found many trilobite bits and pieces but with no success of finding a whole one. Almost walking by I spotted a rock with a trilobite middle section (Thorax) in it along with the tail (Pygidium) but the head (Cephalon) was missing. I hesitantly picked it up and put it in my back pack. At home I was washing that sample when it popped out of the matrix on to the ground. I picked it up and flipped it around only to see two eyes staring back at me. It was a complete trilobite but it is what they call a rolled up or in this case a folded up trilobite because the head was folded over to the other side. Apparently trilobites rolled up when frightened just like their land cousins the pill bugs or rolly pollys you see today. Now I am trying to think back, how many times I may have left a seemingly partial trilobite behind and it was actually rolled up!
Lessons learned: 1) When in doubt, bag your specimen and examine it later.
2) Collect unknown markings and fossils and study and search for them in books. The R.O.M. Royal Ontario Museum is a great help too. The markings may turn out to be fabulous pseudo-fossils like burrows or track marks. New fossil species are still being discovered in Ontario and who knows you could have it named after you!
3) Collecting in shallow creek beds near bedrock can be very rewarding. The eroding action on rock can reveal some amazing fossils where they normally would be obscured.
4) This one you already know otherwise you wouldn’t be reading this. Get into a local rock club. You can learn a lot from other collectors about fossil and mineral locations and exchange information from others who have been in the field.
This folded trilobite actually gained some fame by being displayed at a local university for a few years and it was even featured on a recent geology DVD.
So remember, keep your eye on your tri… Your fossil may just become famous!
Article originally submitted to the KRFC Kawartha Rock and Fossil Club and NPGS Niagara Peninsula Geological Society newsletter September 2011. Thanks to David Rudkin at the R.O.M. for getting me started in fossil collecting.
Trilobite and other fossil collecting tips (part 1) by Martin Legemaate
I guess I can be considered a seasoned fossil collector now but I had much to learn earlier on. One time I was walking along the Georgian Bay shore near Thornbury because I had heard it was a great fossil trilobite location. I found many trilobite bits and pieces but with no success of finding a whole one. Almost walking by I spotted a rock with a trilobite middle section (Thorax) in it along with the tail (Pygidium) but the head (Cephalon) was missing. I hesitantly picked it up and put it in my back pack. At home I was washing that sample when it popped out of the matrix on to the ground. I picked it up and flipped it around only to see two eyes staring back at me. It was a complete trilobite but it is what they call a rolled up or in this case a folded up trilobite because the head was folded over to the other side. Apparently trilobites rolled up when frightened just like their land cousins the pill bugs or rolly pollys you see today. Now I am trying to think back, how many times I may have left a seemingly partial trilobite behind and it was actually rolled up!
Lessons learned: 1) When in doubt, bag your specimen and examine it later.
2) Collect unknown markings and fossils and study and search for them in books. The R.O.M. Royal Ontario Museum is a great help too. The markings may turn out to be fabulous pseudo-fossils like burrows or track marks. New fossil species are still being discovered in Ontario and who knows you could have it named after you!
3) Collecting in shallow creek beds near bedrock can be very rewarding. The eroding action on rock can reveal some amazing fossils where they normally would be obscured.
4) This one you already know otherwise you wouldn’t be reading this. Get into a local rock club. You can learn a lot from other collectors about fossil and mineral locations and exchange information from others who have been in the field.
This folded trilobite actually gained some fame by being displayed at a local university for a few years and it was even featured on a recent geology DVD.
So remember, keep your eye on your tri… Your fossil may just become famous!
Article originally submitted to the KRFC Kawartha Rock and Fossil Club and NPGS Niagara Peninsula Geological Society newsletter September 2011. Thanks to David Rudkin at the R.O.M. for getting me started in fossil collecting.
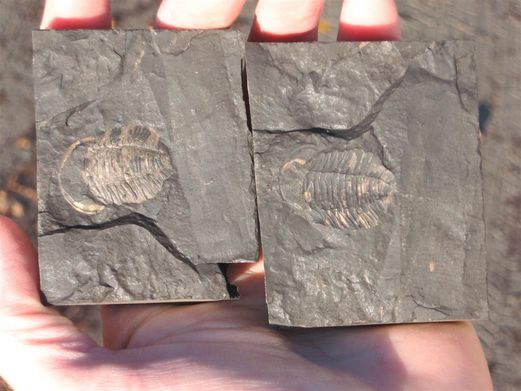
Trilobite (Pseudogygites Latimarginatus) Front (Cephalon)
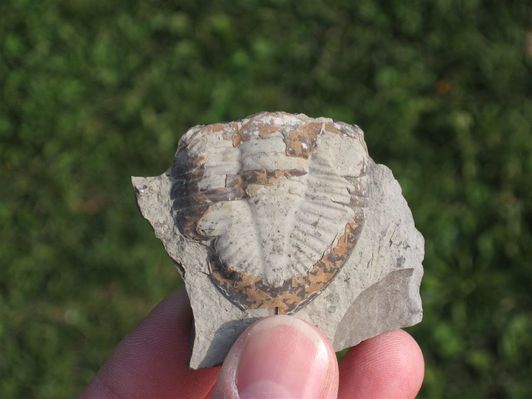
Trilobite (Pseudogygites Latimarginatus) Back (Thorax and Pygidium)
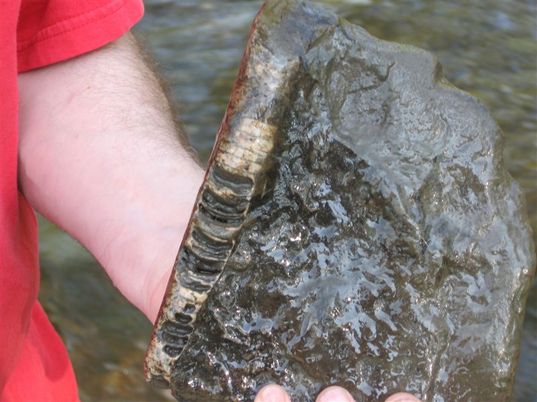
Mark Kenyon finds a great cephalopod in Mimico Creek beautifully revealing inner chambers.
The rock splitting and cleaning was already done by the waters eroding power.
The rock splitting and cleaning was already done by the waters eroding power.
Outa’ Site!
Fossil collecting tips (part 2) by Martin Legemaate
Have you ever been frustrated about visiting a known fossil site location only to find a new sign posted “Protected site. No removing of any material,” translated for us rock hounds it means “No fossil collecting.” It’s a little ironic because conserving these sites and not allowing collectors actually allows for the quick deterioration of fossils because of exposure to the elements and are now lost forever which in turn inhibits study and research! So what are the alternatives? Perhaps road cuts near the protected site that cut through the same rock formation but these are usually too dangerous especially for kids. More and more sites are being enclosed in parks too and thus are off limits to hammers. I have just recently discovered another good collecting alternative when I was in the Whitby area studying of all things “the Whitby Shale” (now called the Collingwood member of the Upper Lindsay Formation). I came across a dormant construction site with piles of glacial till also containing slabs of bedrock shale. Usually around a several mile radius of a bedrock site the upper glacial till contains pieces of the same bedrock. As the glaciers moved across this area of North America it scraped up bedrock and redistributed it near by. The shale is the same stuff that is exposed on the shore of Georgian Bay at Craigleith and in the St. Mary’s quarry in Bowmanville. It is an oil shale and is chock full of fossils including the trilobites Pseudogygites and Triarthrus. So what do I do when I want to check the quality of a site? What I usually do, bring a bunch of kids to poke around (They tend to find the good small stuff!). It produced a good yield and the kids had a good time. So if you too are frustrated at the disappearing fossil sites just check out your local gravel pile. You too may be surprised!
Article originally submitted to the KRFC Kawartha Rock and Fossil Club and NPGS Niagara Peninsula Geological Society newsletter October 2011.
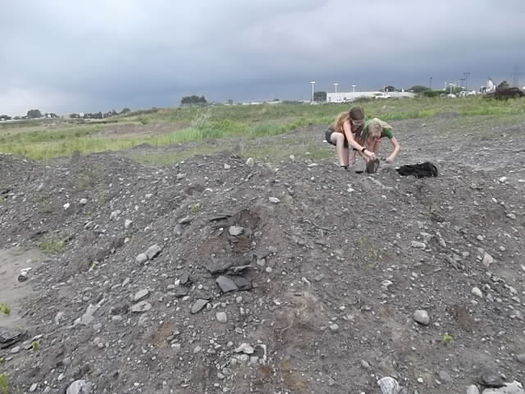
A simple glacial till pile can yield great fossils.
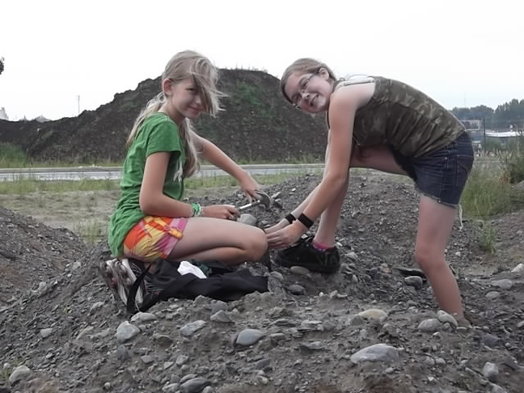
Miriam Legemaate and Rebecca Kenyon splitting open black oil shale looking for that perfect specimen.
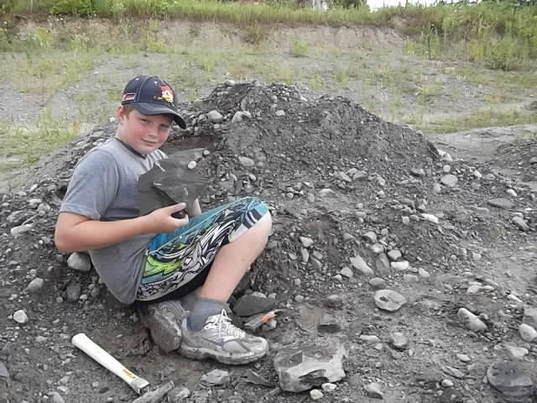
Mitchell Milligan finds some excellent fossils.
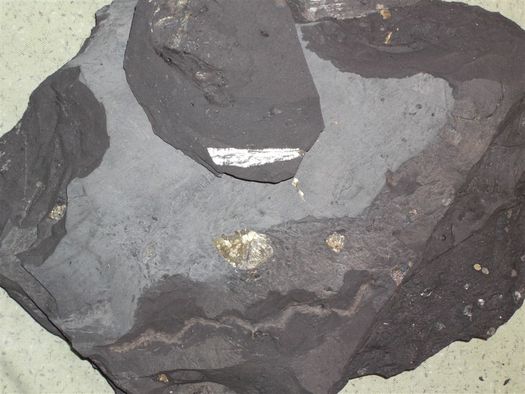
Amazing pyritized fossils are found here.
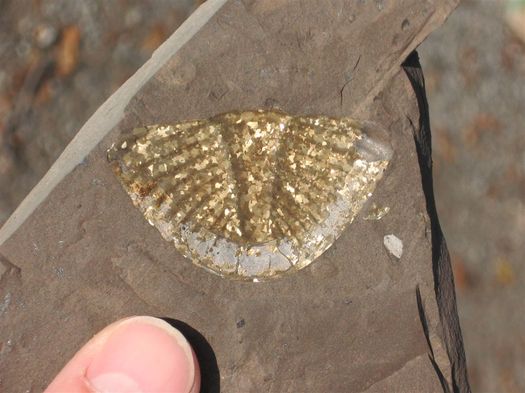
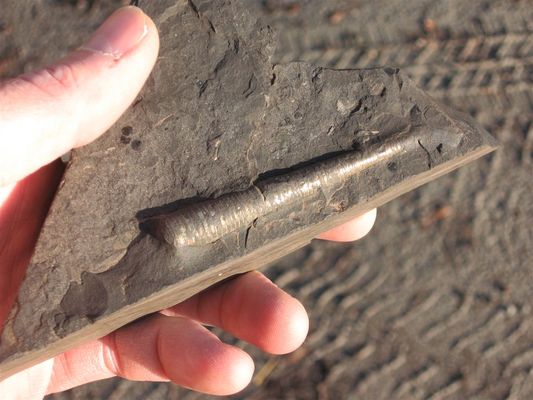
Pyritized trilobite pygitium (tail) (pseudogygites latimarginatus)
Complete trilobite and cast ( triarthrus eatoni)
Cephalopod
For Crinoid Out Loud!
Fossil Collecting Tips (Part 3)
By Martin Legemaate
It's been a while since the last two fossil collecting tip articles were published (See newsletters September and October 2011).
This one not only covers spotting and collecting but also prepping fossils. As many of you collectors (painfully) know,
fossils are usually embedded in hard rock and without the proper fancy prepping tools, the fossil usually remains obscured
in the rock matrix; but did you know that fossils can be found in clay and loose shale too? Much of the sedimentary rock layers in Ontario consist of inter-bedded limestones, shales, sandstones and clay. I discovered this several years ago when visiting the
Arkona and Hungry Hollow area, in-between limestone beds are clay beds where intact fossils are just falling out
of them. No hammer required!
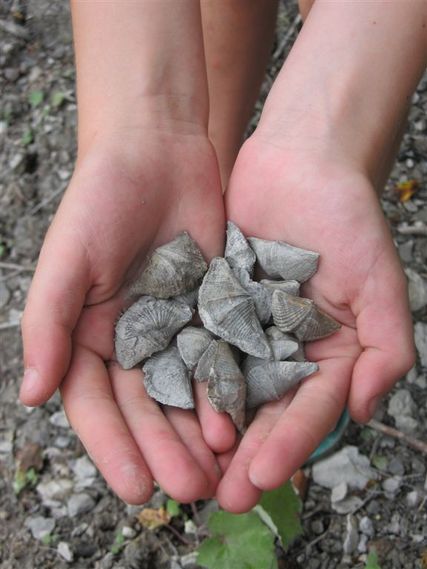
Brachiopods in clay at Hungry Hollow Ont.
The Verulam Formation is another good example of inter-bedded rocks that are exposed in many areas of Central Ontario.
(See Bill Hessin's book, South Central Ontario Fossils for great Verulam Formation fossil sites.)
Care is needed but some of the best and easily accessible sites are road cuts. Here are a few tips I learned when collecting at a road cut near Lindsay which rewarded me with some great crinoid stems, one being 13½ inches long!
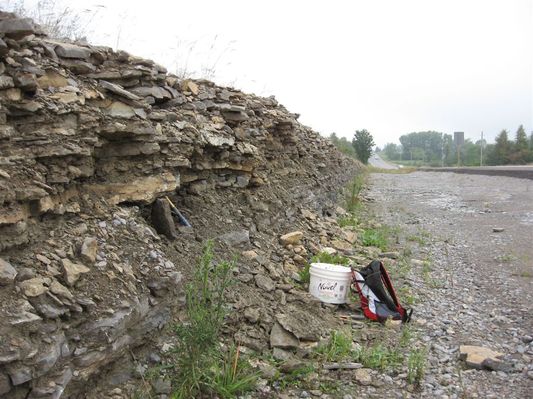
Lindsay Road Cut exposing the Verulam Formation
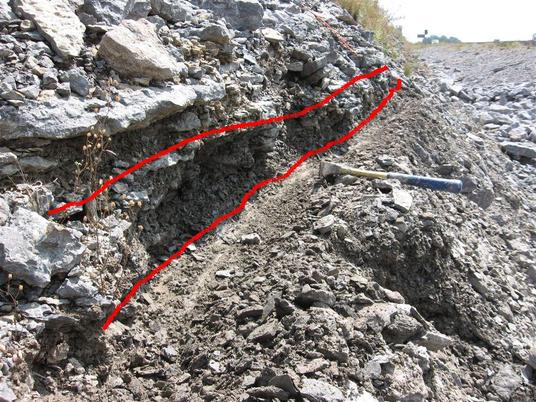
Clay Bed Outlined in Red.
Some clay beds may be completely devoid of fossils while others are stuffed full. The best thing to do is walk along the cut and look for fossil debris that has fallen out of the rock face into the talus (the sloping mass of loose rocks at the base of the cliff).Where there are several fossil bits, look up on the face and find anything sticking out of the clay seam or seams. Dig around the fossil until it pops out. If it is a crinoid stem continue digging while removing each crinoid section and placing it in a container. (I use an egg carton and put about three crinoid sections in each egg cup so I can better assemble it at home again.) Eventually the stem will dead end.
(Due to the turbulent environment when most of the sediments were laid down in Ontario you will rarely find a complete crinoid.)
Don't forget, there can be loose fossils in the talus too, usually exposed after a good rain.
(Due to the turbulent environment when most of the sediments were laid down in Ontario you will rarely find a complete crinoid.)
Don't forget, there can be loose fossils in the talus too, usually exposed after a good rain.
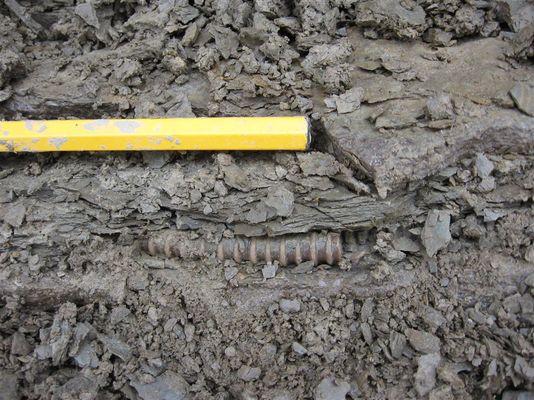
Crinoid stem just peeking out of the clay. Chisel shows relative size of stem.
Now the prepping process. The fossils will simply need a rinsing of water and perhaps a light wet brushing and then a rinse.
I use old tooth brushes!
I use old tooth brushes!
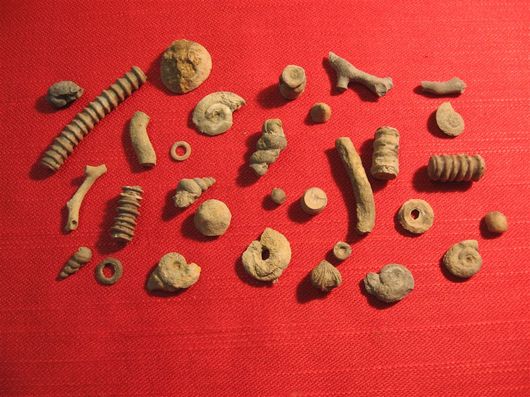
Assorted fossils after cleaning which include gastropods,branch and mound bryozoans, crinoid stem sections and brachiopods.
The crinoid stems will need a little more care so I will concentrate on them now.
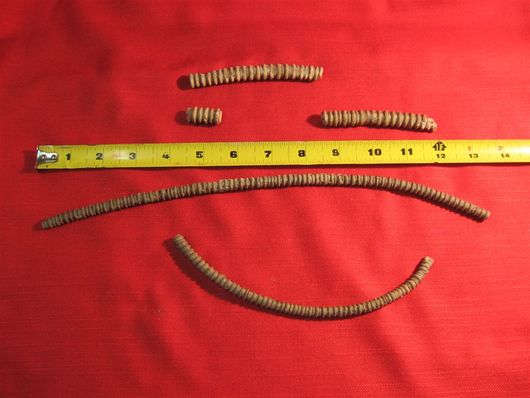
1) Lay out the stem pieces on a table in a row approximately the same way you collected them.
1) Lay out the stem pieces on a table in a row approximately the same way you collected them.

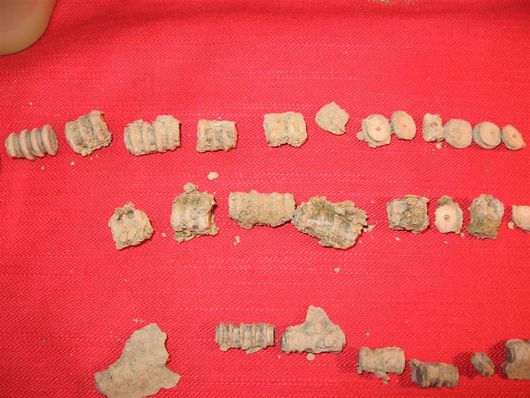
Crinoid stem pieces laid out before brushing and washing.
My work is cut out for me.
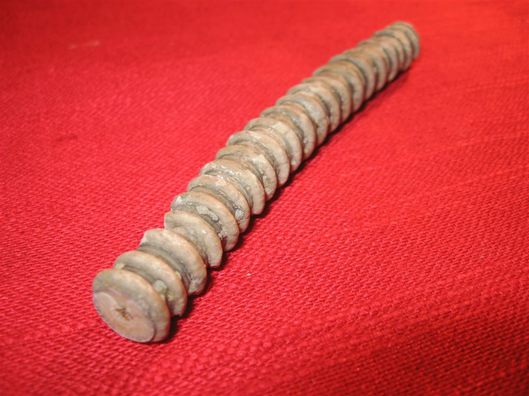
4) If you like jig saw puzzles then this stage is for you. Like snow flakes, no two crinoid breaks are alike plus each break has a negative and a positive side to it so the connection is easily identifiable with practice. Also, the ribbed crinoids are more tapered on one side so you will know what direction to lay them out in. When you start to find a few matching pieces use a very small amount of crazy glue and hold the sections together for about 15 seconds. Repeat until every piece is matched up again. It is a lot of work but the result is breathtaking.
Crinoid stems (Archaeocrinus) after prepping.
An excellent addition to the collection!
Article originally submitted to the KRFC Kawartha Rock and Fossil Club newsletter October 2013.
All Cracked Up!
Fossil Collecting Tips Part 4 By Martin Legemaate
Every fossil site has different rock that requires a different way to remove the fossils in it. Last time (Fossil Collecting Tips Part 3) I concentrated on loose clay, this time I’ll concentrate on softer limestone. There are rock exposure areas in Southern Ontario such as Collingwood and Port Hope to Belleville where some fossils can be completely popped out of the matrix (the surrounding rock) by simply using a hammer and chisel.
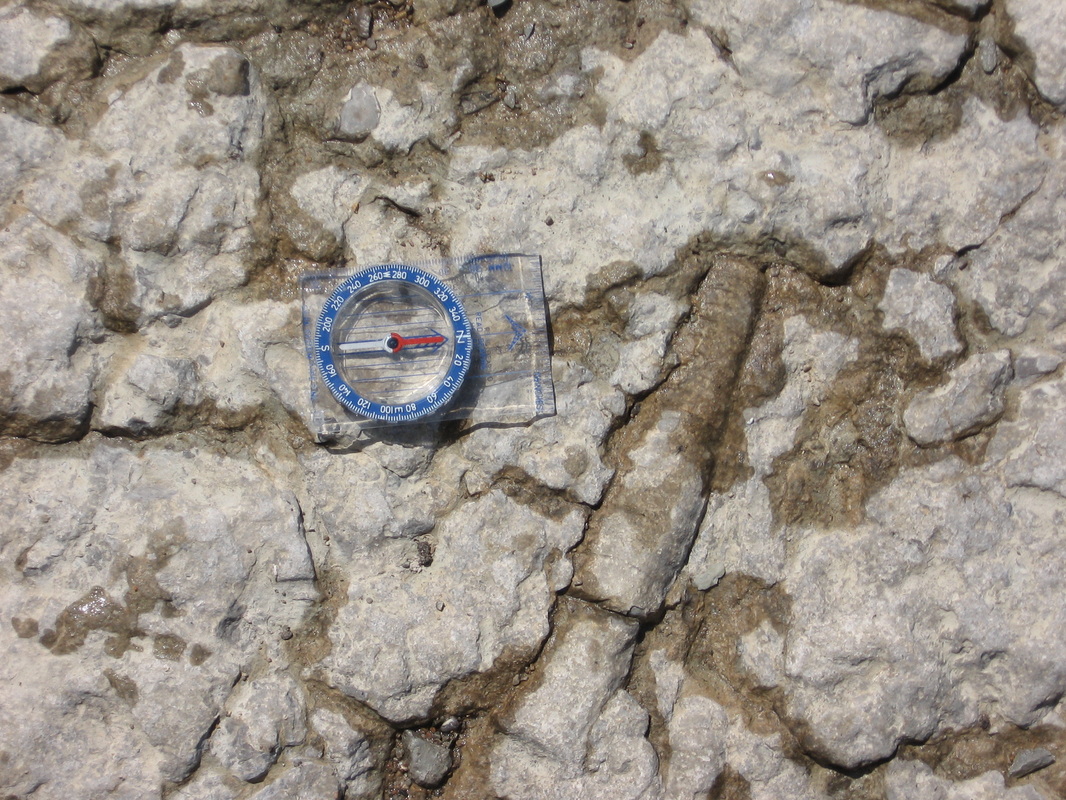
Figure 1, A Cephalopod as found on the beach in Collingwood. This one can easily be removed. (see below compass)
|
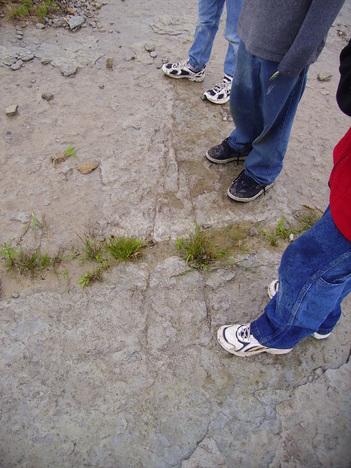
Figure 2, A well worn but amazing 5 foot long cephalopod on the beach. Too late to collect this one.
|
However usually a good rule of thumb is if a fossil that you have collected is in a fairly small slab and at least one side is visible, don’t attempt to chisel it out further or you may damage it. Just a good rinse will clean it up. A fossil can look just as good in the matrix as out. Here is a fossil cephalopod (figure 4) from Collingwood that I left in the matrix. As an added touch I trimmed the bottom of the rock with a small rock cutting tool so that it could stand up and display well.
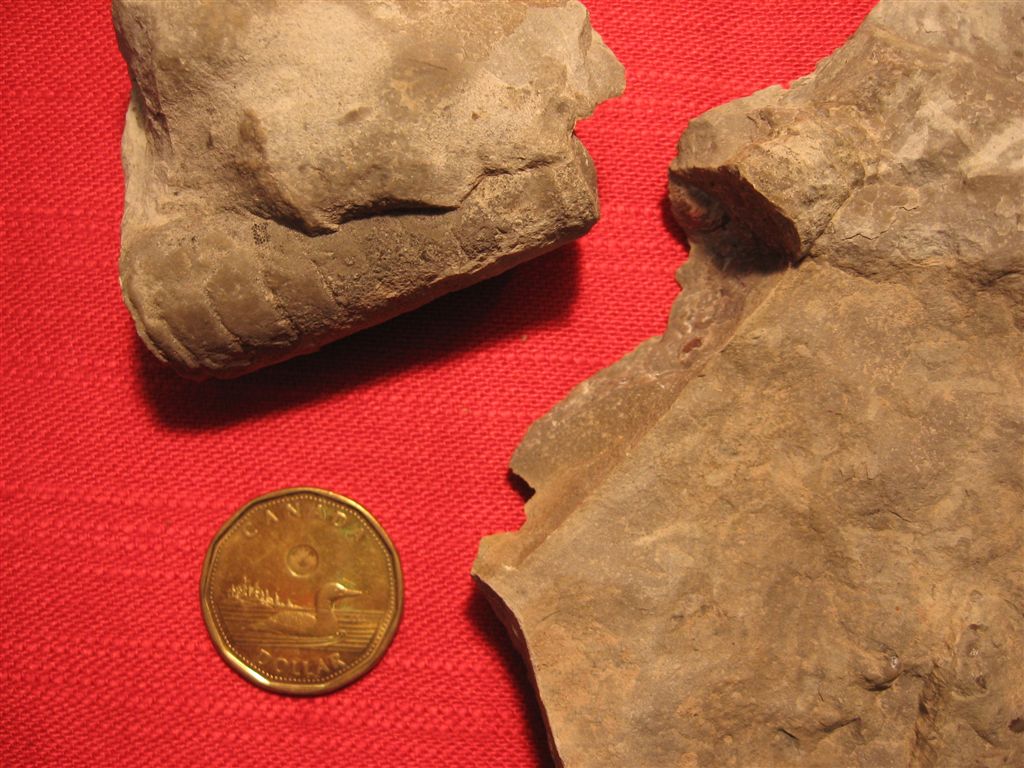
Figure 3, Cephalopod found as is
|
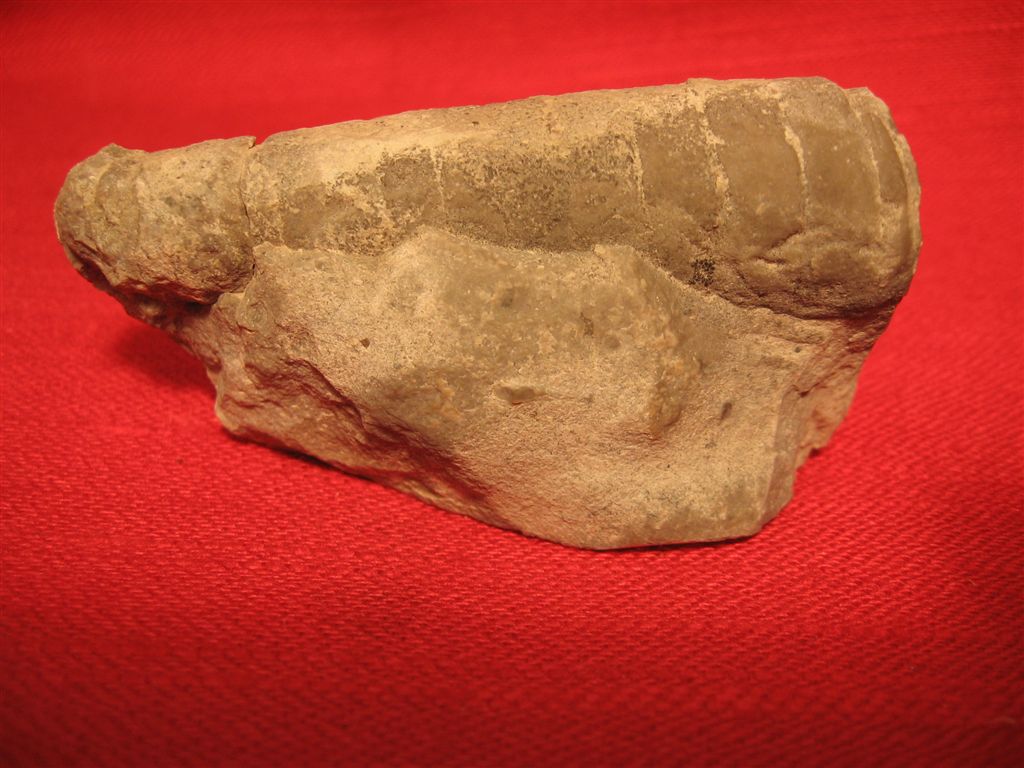
Figure 4, After a trim and clean up
|
Don’t loose heart if you break a fossil while attempting to remove it. Lepage’s is a wonderful thing! Continue removing the rest of the fossil, gather all the pieces together and bring them home. At home some chiseling may still need to be done. After wash all the pieces and let them completely dry. For glue you can use crazy glue but I like to use something a little thicker like 5 minute epoxy that you can pick up at any hardware store. You have to act fairly fast when gluing so line up the pieces ahead of time so you know where they go. Mix a small amount of the 2 epoxy components together with a tooth pick, place a small amount in the middle of the broken off area and push the 2 pieces together. Hold for a few minutes or what I do is set them down somewhere in a position that gravity will hold them together then I am able to work on several pieces at a time. The results will surprise you! Here are some before and after shots of some fossils collected in the Collingwood area in Spring.
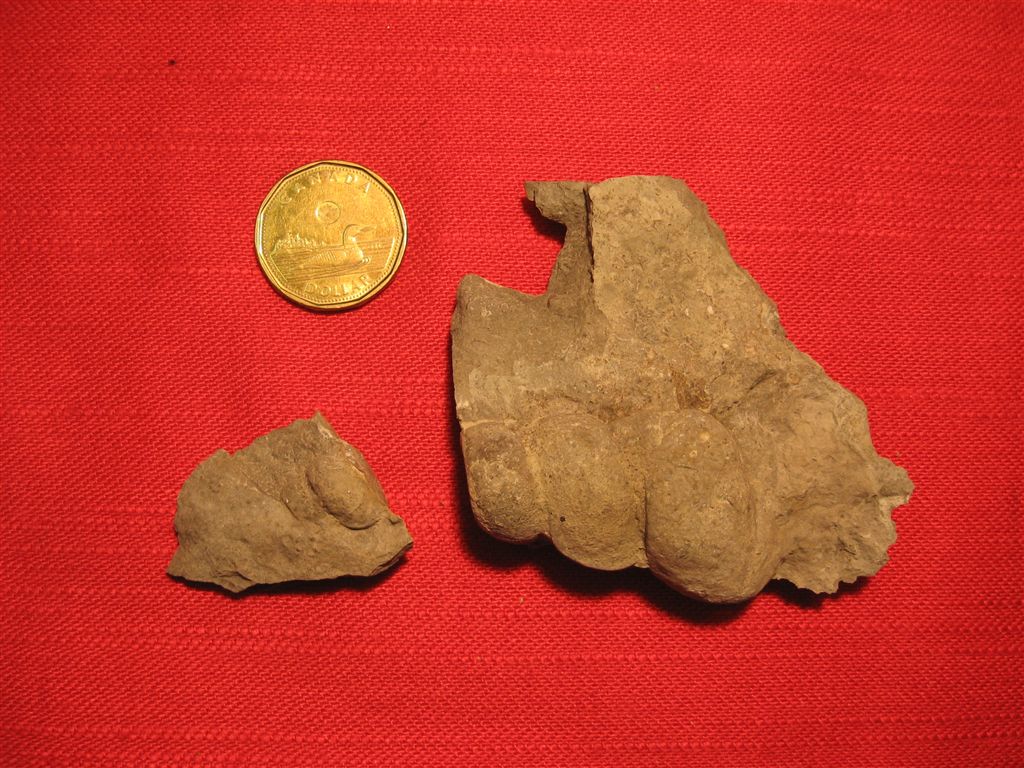
Figure 5, Gastropod Before. More chiseling needed here then a washing and gluing

Figure 7, Cephalopod Before. Wash and glue

Figure 9, Gastropod Before. Wash and glue
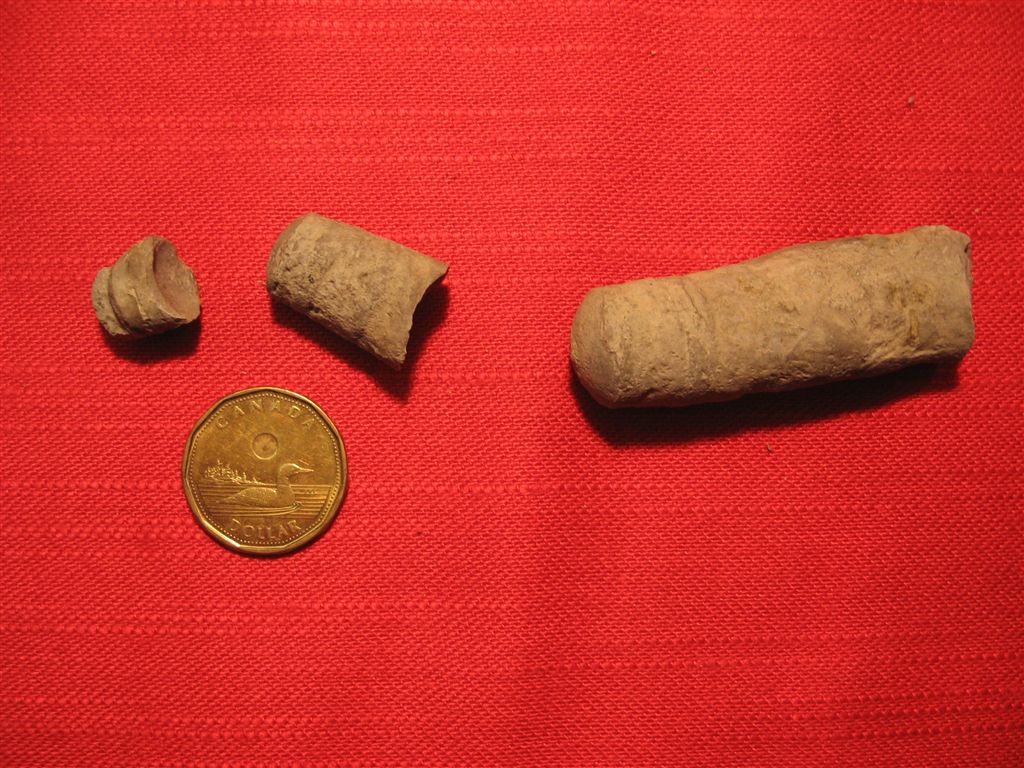
Figure 11, Cephalopod Before. Wash and glue
|
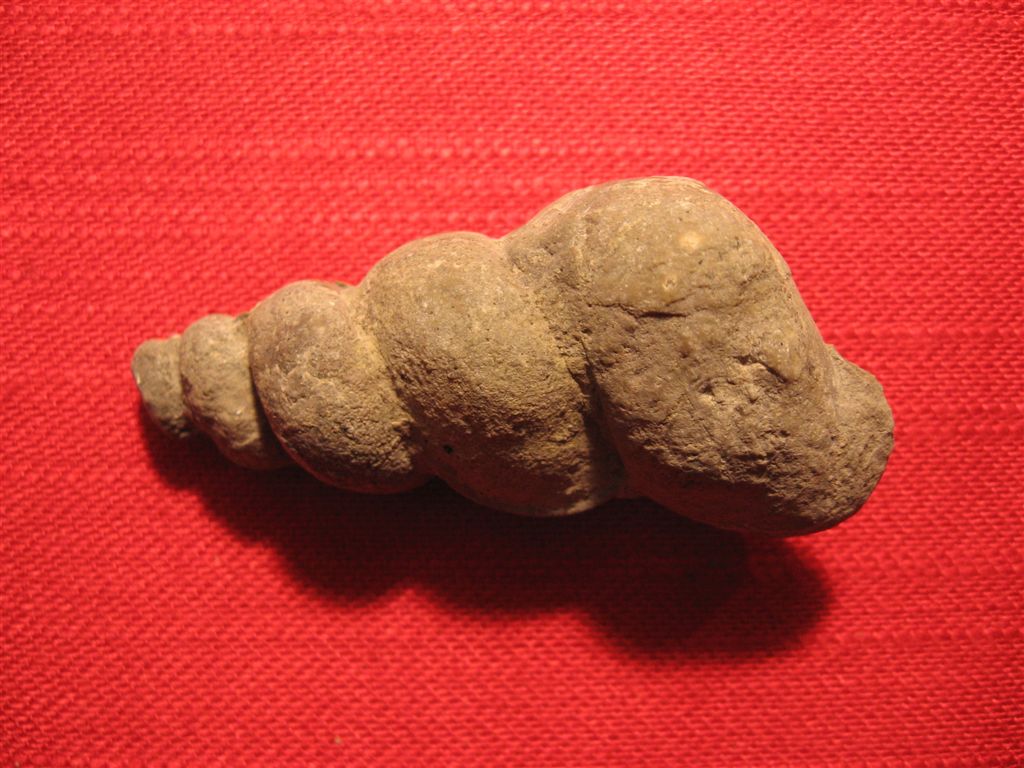
Figure 6, Gastropod After
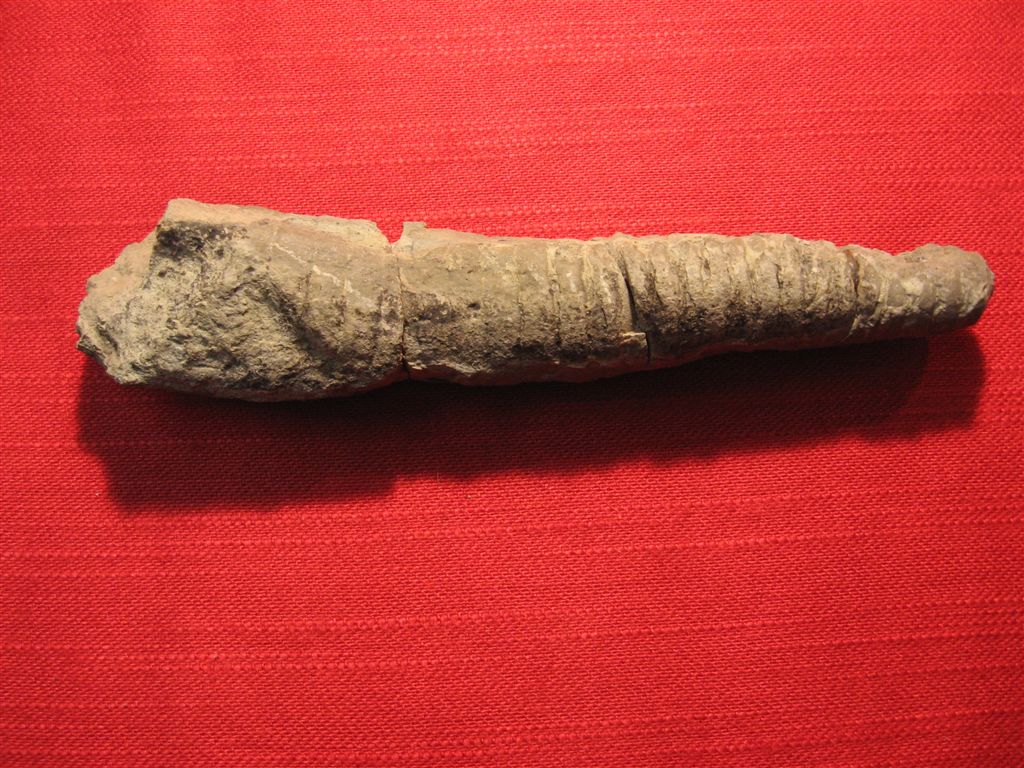
Figure 8, Cephalopod After
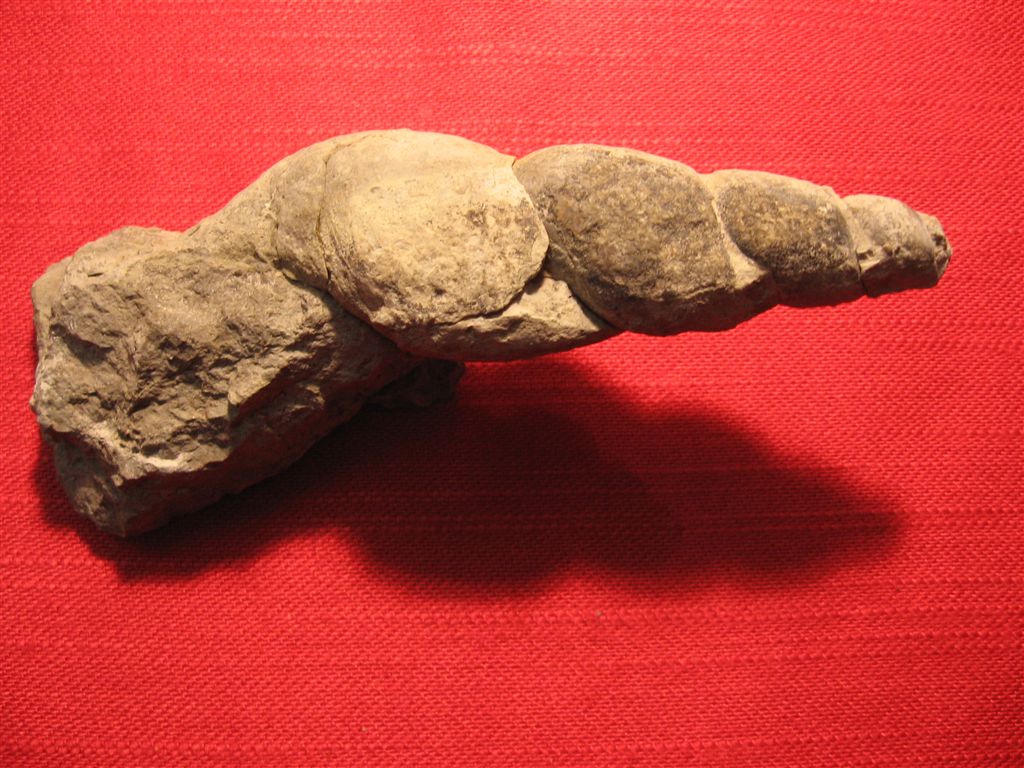
Figure 10, Gastropod After
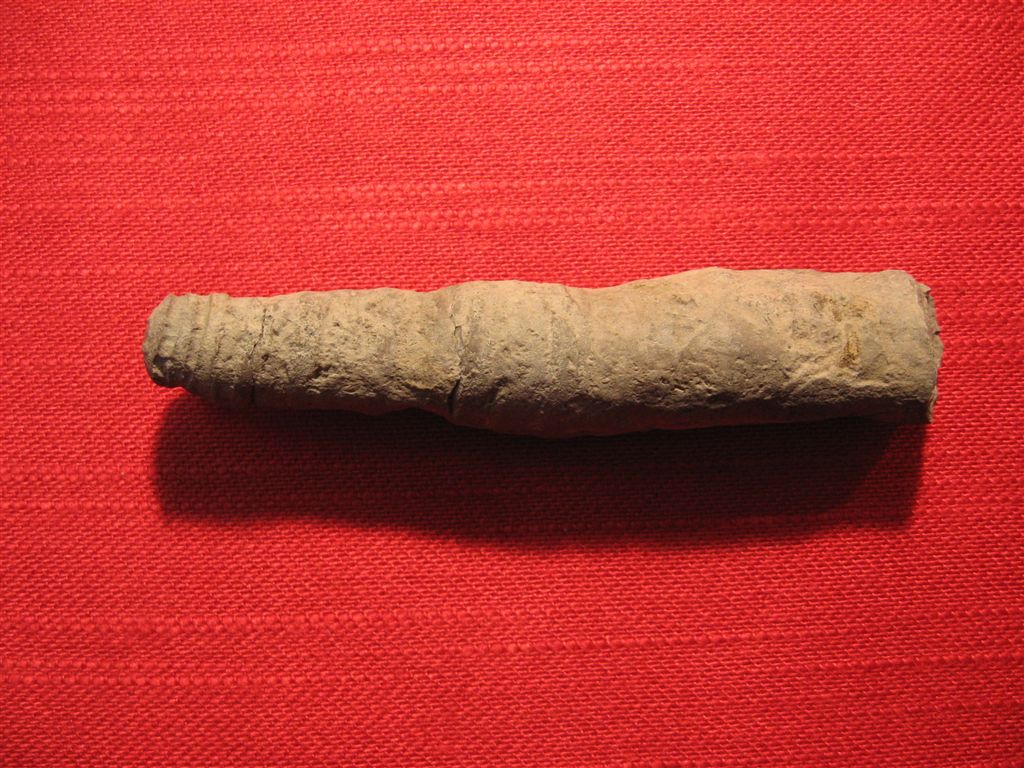
Figure 12, Cephalopod After
|
Quite impressive and yes I know some of you have the fancy prepping equipment and I have some too but these are methods I have learned over the years and hope the novice collector reading this can be encouraged with these tips as he or she will also eventually move up to the cool prepping gadgets!
Article originally submitted to the KRFC Kawartha Rock and Fossil Club and NPGS Niagara Peninsula Geological Society newsletter October 2014.
Article originally submitted to the KRFC Kawartha Rock and Fossil Club and NPGS Niagara Peninsula Geological Society newsletter October 2014.